Garmin Vivoactive 3 Tips And Tricks + (Avoid These Features)
If you have recently owned a Garmin Vivoactive 3 and don’t know much about this watch, then you are in the right place to know about some fantastic tips and tricks of Garmin Vivoactive 3.
Vivoactive 3 is packed with dozens of unique features, including health & fitness tracking features, GPS, live tracking, safety features, play music, set goals, create exercises, and much more.
You can use Vivoactive 3 for multiple purposes, like running, hiking, cycling, as a gym tracker, for navigation purposes, swimming, and more. There is no deficiency of features in this durable watch.
Without wasting time let’s have look on some of exciting thing in Vivoactive 3!
Related Posts:
Top Garmin Vivoactive 3 Tips And Tricks
Auto Activity Tracking

Most of the Garmin watches come with Auto activity tracking, means you don’t need to manually monitor the specific sport activity. This feature is also present in Galaxy Watches. But in Garmin, you have an option to Turn auto activity on or off.
Auto activity detection keep on few sensors all the time and consumes the battery. But you can use them on special occasions like hiking, or cycling, etc. It’s effortless to adjust the auto activity tracking.
Follow these simple steps to adjust it;
- Go to Garmin Connect App
- Access the Menu
- Now select your Garmin Device
- Search for “Auto Activity Start”
- Now you can enable or disable it according to your desire
- Select the back arrow, and this will automatically save all the settings
Note: The Garmin Connect app cannot determine when an activity started when Auto Activity Start is enabled; therefore, it is impossible to view it up to 24 hours after it has begun.
[amalinkspro type="showcase" asin="" apilink="https://amzn.to/3eg7Hj2" new-window="true" addtocart="false" nofollow="true" sc-id="4" imgs="%3Ca%20href%3D%22https%3A%2F%2Fwww.amazon.com%2FGarmin-v%25C3%25ADvoactive-Smartwatch-Contactless-Payments%2Fdp%2FB074KBWL9J%3Fdchild%3D1%26keywords%3Dvivoactive%2B3%26qid%3D1620152462%26sr%3D8-3%26linkCode%3Dli2%26tag%3Dpanjtan-20%26linkId%3D116af30a03e2c3515fb4c6770a1586b4%26language%3Den_US%26ref_%3Das_li_ss_il%22%20target%3D%22_blank%22%3E%3Cimg%20border%3D%220%22%20src%3D%22%2F%2Fws-na.amazon-adsystem.com%2Fwidgets%2Fq%3F_encoding%3DUTF8%26ASIN%3DB074KBWL9J%26Format%3D_SL160_%26ID%3DAsinImage%26MarketPlace%3DUS%26ServiceVersion%3D20070822%26WS%3D1%26tag%3Dpanjtan-20%26language%3Den_US%22%20%3E%3C%2Fa%3E%3Cimg%20src%3D%22https%3A%2F%2Fir-na.amazon-adsystem.com%2Fe%2Fir%3Ft%3Dpanjtan-20%26language%3Den_US%26l%3Dli2%26o%3D1%26a%3DB074KBWL9J%22%20width%3D%221%22%20height%3D%221%22%20border%3D%220%22%20alt%3D%22%22%20style%3D%22border%3Anone%20!important%3B%20margin%3A0px%20!important%3B%22%20%2F%3E" link-imgs="false" specs="Accurate GPS~~~ VO2 max ~~~15 preloaded GPS and indoor sports apps Garmin Pay~~~Garmin Connect" btn-color="#ff9900" btn-text="Buy on Amazon" alignment="alignnone" hide-prime="0" hide-image="0" hide-price="0" hide-button="0" width="750"]Garmin Vivoactive 3[/amalinkspro]
Setup safety features in Garmin Vivoactive 3
This is the most crucial feature that most people ignore. Safety tracking feature only found in Garmin high-end smartwatches, but all the devices in the Vivoactive series offer this feature.
If you have a new Garmin Vivoactive 3, then, first of all, set up the safety features. But how do these safety features help you?
In case, If you meet an accident during any activity, the watch will automatically sense that incident and immediately notify your emergency contacts. So, first of all, you need to add your emergency contacts from the Garmin Connect app.
The automated message contains your name, LiveTrack link, and GPS location. So you must turn on the Live Tracking feature when you are performing an adventure.
You can also turn on/off the incident detection feature. We recommend you turn it off while performing indoor activities, and it will save battery life.
Tips To Save Current Location For Navigation
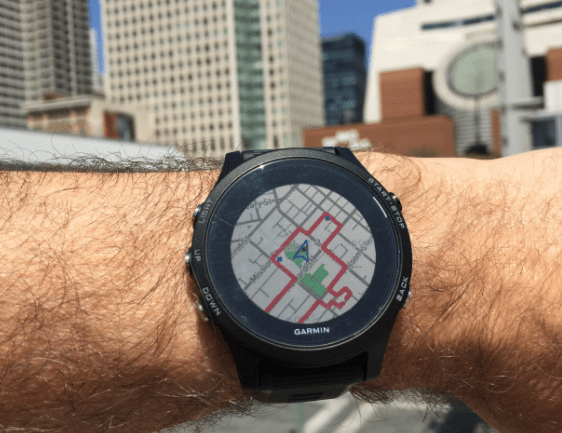
By choosing Garmin Vivoactive 3, you have done a great job because its GPS tracking is appreciable. The precise and quick GPS tracking will never let you alone, even in deserted areas.
The GPS in Vivoactive 3 is spread by plenty of features. One of them is to save your current location for navigation later. This is a pretty helpful feature for adventurers, hikers, or cyclists.
If you are entered in some unknown place, stop and save your current location and then continue your journey. So, later on, you can trackback to your initial point. This feature helps you never to be stuck in an unknown place.
Again it’s too easy to set up this function, you need to visit the Garmin Connect app, and there you can do every setting. Follow this guide to save your current location.
Create Your Workouts
If you love GYM, then this feature is fantastic for you. Garmin Vivoactive 3 enables you to create custom workouts, creating workouts for specific activities. These personalized workouts reflect your fitness goals and targets.
There are two main steps to create personalized workouts or exercises. Firstly you need to create your desired workout using the Garmin Connect app and then send the workout to your device.
Step 1:
- Open the Garmin app from your phone
- Select the menu option
- Now choose Training->Workouts
- Create your custom workout and select workout type
- Finally, set up the workout and save
Note: You can set the warm-up time, activity type, recovery, rest and cool down time, and dome generic workout options.
Step 2:
- Open the Garmin Connect app; from the workout page, select the workout you want to share
- Now select the Send To icon
- Choose the device to share workout
- Congratulations, you have done
Note: Some Garmin devices will automatically stop the activity timer once the final step of the workout has been completed on your device. To resume the activity timer after the final step of your workout, you can press the start/stop button on your device.
Customize Garmin Vivoactive 3
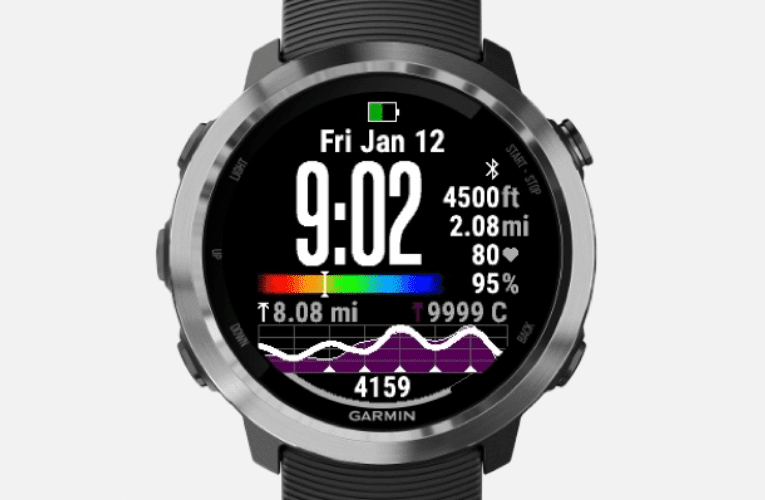
Garmin Vivoactive 3 is fully customizable, and you can take massive advantage of it. By default, you will see three custom pages on the watch screen itself. Then you can choose different widgets like distance, pace, or speed.
It’s pretty simple to customize the watch face, tap on the watch face, and swipe to choose one. There are a lot of built-in watch faces available. You can choose any of them according to your need, and few watch faces are also customizable.
Apart from this, you can use third-party apps or download extra widgets and watch faces from Garmin Connect. Here you will get everything from your route widgets to power meter and more. Follow these steps to download apps.
- Go to your Garmin Connect IQ app from your phone
- Tap on your Garmin device icon
- Tap Activites & App Management
- Now go to “Get More Applications.”
- From here, you can install your favorite app
You are free to install any widget, watch faces, cycling apps, running apps, and more. The most famous running apps that you should try are Running power, dWMap, Ride, etc. In addition, I recommend you install an Accu weather widget that helps you to get a daily weather forecast.
[amalinkspro type="showcase" asin="" apilink="https://amzn.to/3eg7Hj2" new-window="true" addtocart="false" nofollow="true" sc-id="4" imgs="%3Ca%20href%3D%22https%3A%2F%2Fwww.amazon.com%2FGarmin-v%25C3%25ADvoactive-Smartwatch-Contactless-Payments%2Fdp%2FB074KBWL9J%3Fdchild%3D1%26keywords%3Dvivoactive%2B3%26qid%3D1620152462%26sr%3D8-3%26linkCode%3Dli2%26tag%3Dpanjtan-20%26linkId%3D116af30a03e2c3515fb4c6770a1586b4%26language%3Den_US%26ref_%3Das_li_ss_il%22%20target%3D%22_blank%22%3E%3Cimg%20border%3D%220%22%20src%3D%22%2F%2Fws-na.amazon-adsystem.com%2Fwidgets%2Fq%3F_encoding%3DUTF8%26ASIN%3DB074KBWL9J%26Format%3D_SL160_%26ID%3DAsinImage%26MarketPlace%3DUS%26ServiceVersion%3D20070822%26WS%3D1%26tag%3Dpanjtan-20%26language%3Den_US%22%20%3E%3C%2Fa%3E%3Cimg%20src%3D%22https%3A%2F%2Fir-na.amazon-adsystem.com%2Fe%2Fir%3Ft%3Dpanjtan-20%26language%3Den_US%26l%3Dli2%26o%3D1%26a%3DB074KBWL9J%22%20width%3D%221%22%20height%3D%221%22%20border%3D%220%22%20alt%3D%22%22%20style%3D%22border%3Anone%20!important%3B%20margin%3A0px%20!important%3B%22%20%2F%3E" link-imgs="false" specs="Accurate GPS~~~ VO2 max ~~~15 preloaded GPS and indoor sports apps Garmin Pay~~~Garmin Connect" btn-color="#ff9900" btn-text="Buy on Amazon" alignment="alignnone" hide-prime="0" hide-image="0" hide-price="0" hide-button="0" width="750"]Garmin Vivoactive 3[/amalinkspro]
Aavoid Few Feature To Save Battery Life
Although Garmin watches offer long-lasting batteries, there is still more room to save battery life. So on Vivoactive 3, you should make some changes to get more solid battery life.
As Garmin Vivoactive 3 comes with AOD (Always On Display) that consumes more battery life, However, you have an option to disable AOD. Also, you can reduce the brightness level from the settings.
Next, most people use Auto Activity tracking every time, and it also consumes a considerable amount of battery. Therefore, I recommend using this feature only if you are on an adventure like hiking or cycling, etc. By disabling this feature, you need to track your specific activity manually.
High backlight is the other major cause of battery draining. If you mostly stay indoors, then we would recommend keeping the backlight at 10 percent. It will also enable you to extend the battery life.
Side Swipe Features
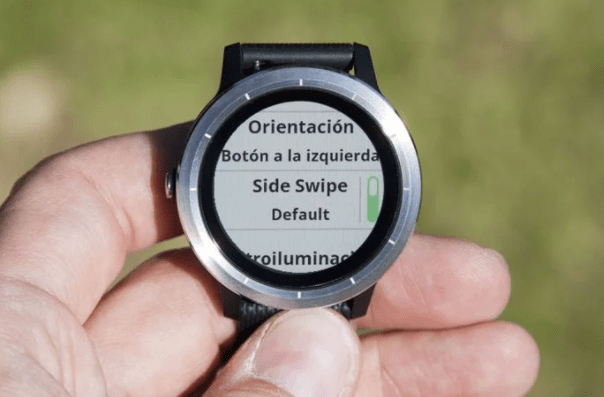
Most of the Vivoactive 3 users don’t know about this feature. The SideSwipe feature allows you to control the side area of your watch.
By using this feature, you can scroll through lists and menus and also adjust some field values. You can quickly navigate menus with just one finger to scroll.
Most of the Vivoactive 3 users don’t know about this feature. The SideSwipe feature allows you to control the side area of your watch. By using this feature, you can scroll through lists and menus and also adjust some field values. You can quickly navigate menus with just one finger to scroll.
You also have an option to customize the scrolling direction of the sideswipe. Wear the watch with the key facing your wrist if you wish to operate the Side Swipe control with your thumb.
Similarly, wear the watch with the key facing away from your wrist so you can use it with your index finger.
Best Way To Track Your Run
There are many methods to track your running on Vivoactive. For example, you can set your watch to auto activity tracking or do manual tracking. But there is also another quick and easy way to do this job.
This watch comes with a navigation button to track your running, push the side button, tap on Run, and push the button again. Similarly, you can pause the tracking by pushing the button.
Gear Tracking
This is one of the most excellent features in Vivoactive 3, and most people aren’t aware of this. The feature allows you to keep track of the wear, including running shoes and cycling equipment.
Your shoes will flag up when the time has come to change when the distance has been tracked. You can set up this feature from the Garmin Connect app. But, first, go to the Menu->Gear->Enter Gear Information.
You can also edit, remove or retire a specific gear. In addition, you can add information like Gear type, Model, Brand name, Max distance, etc. This feature also helps runners to know the best time to get a new pair of shoes.
Final Words
Vivoaactive 3 is full of features. Under the hood, you will find out more unique and special ones. But above mention Garmin Vivoactive’s tips and tricks are my favorite. If you like this article, please help someone else by sharing it on social networks.