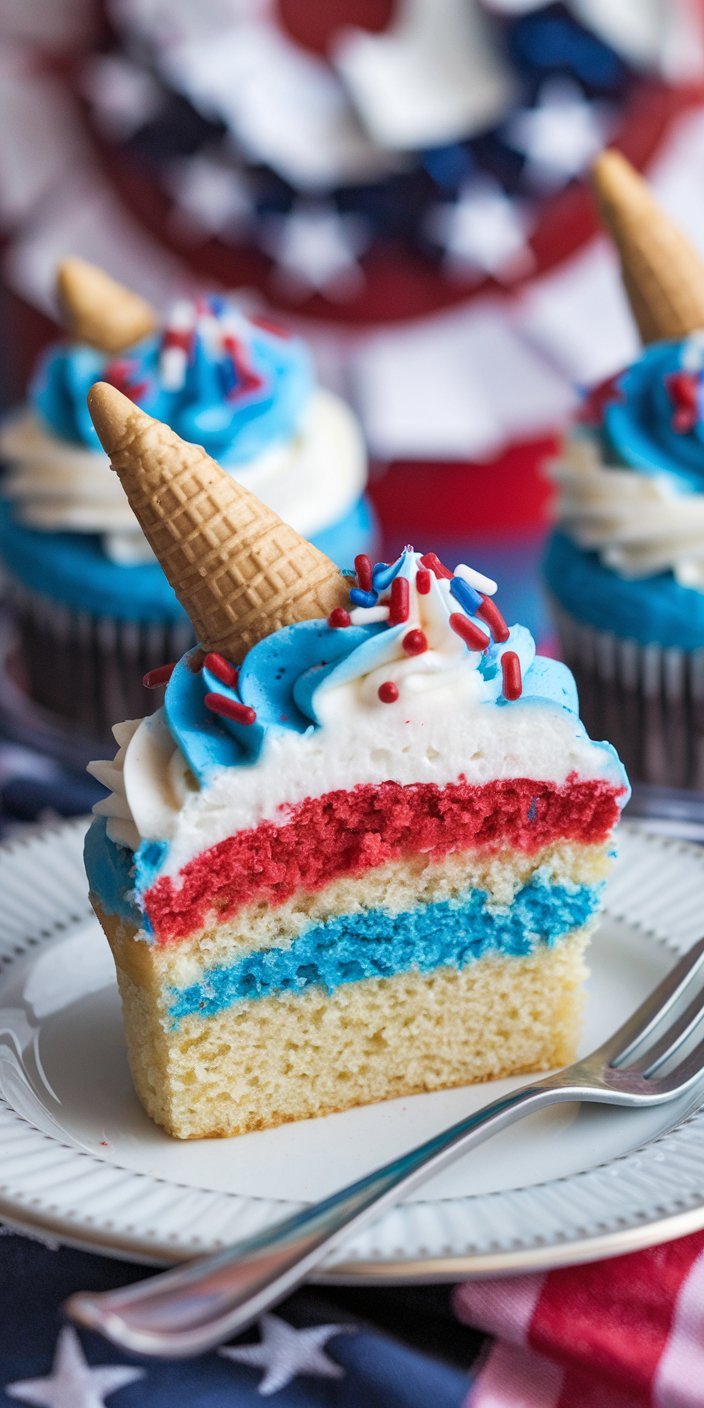
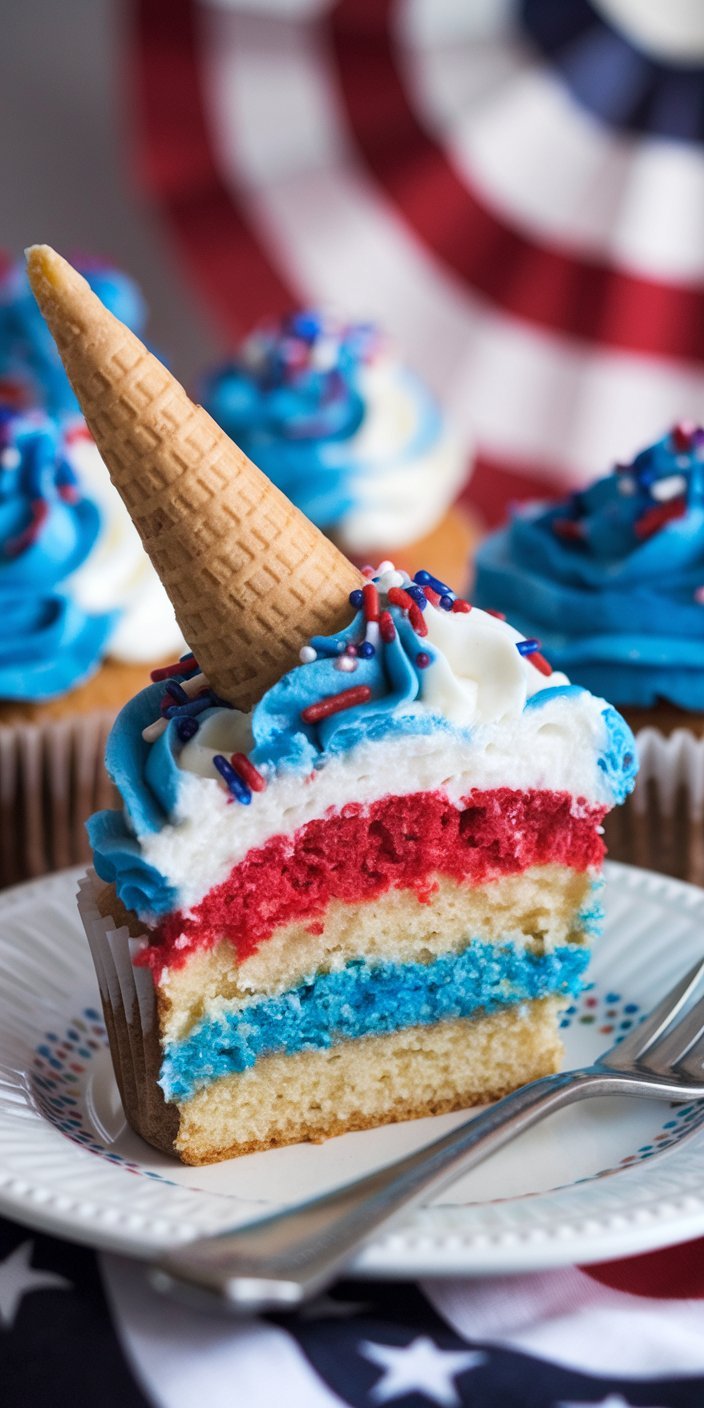
Snow Cone Cupcakes – A Fun, Refreshing 4th of July Treat
Celebrate the summer with these Snow Cone Cupcakes, the perfect blend of fun and flavor for your 4th of Julycelebration! These cupcakes are inspired by the classic snow cone treat, with rainbow-colored frosting that mirrors the vibrant, icy goodness of a snow cone.
With a moist vanilla cupcake base and buttery, colorful frosting piped high on top, these cupcakes are a sweet treat that both kids and adults will love.
Whether you’re hosting a BBQ, a picnic, or watching fireworks, these Snow Cone Cupcakes are sure to make a refreshing statement at your gathering!
Why You’ll Love These Snow Cone Cupcakes
- Festive and Fun: These cupcakes bring the bright, refreshing colors of snow cones to life in cupcake form. With vibrant colors and a whimsical, cone-shaped frosting design, they’re the ultimate summer treat.
- Moist and Fluffy: The vanilla cupcakes provide the perfect base—moist, fluffy, and light—while the rainbow frosting is both creamy and sweet.
- No-Need for a Snow Cone Machine: These cupcakes capture the snow cone experience without the need for ice or a machine. Just a few easy ingredients and a little creativity!
- Kid-Friendly and Fun to Make: Kids will love the colorful frosting and may even want to help decorate them. These cupcakes bring a little extra fun to your summer baking!
- Perfect for 4th of July: With the red, white, and blue color scheme, these cupcakes are perfect for your Independence Day celebration. They’re a sweet, colorful addition to any BBQ or picnic.
Ingredients:
For the Cupcakes:
- 1 ½ cups all-purpose flour
- 1 ½ teaspoons baking powder
- ¼ teaspoon salt
- ½ cup unsalted butter, softened
- 1 cup granulated sugar
- 2 large eggs
- 1 teaspoon vanilla extract
- ½ cup whole milk
For the Frosting:
- 1 cup unsalted butter, softened
- 4 cups powdered sugar
- 2 teaspoons vanilla extract
- 2-4 tablespoons heavy cream (or milk, to adjust consistency)
- Red, blue, and yellow gel food coloring
- Rainbow sprinkles (for decoration)
- Mini cones (optional, for topping)
Step-By-Step Instructions:

Prep Time: 20 minutes
Cook Time: 18-20 minutes
Chill Time: 1 hour (for frosting to set)
Servings: 12 cupcakes
1. Preheat the Oven and Prepare the Cupcake Pan:
Preheat your oven to 350°F (175°C) and line a 12-cup muffin tin with cupcake liners.
2. Make the Cupcake Batter:
In a medium bowl, whisk together the flour, baking powder, and salt. Set aside.
In a large bowl, beat the butter and sugar together until light and fluffy, about 3-4 minutes.
Add the eggs, one at a time, and then the vanilla extract.
Gradually add the dry ingredients to the wet ingredients, alternating with the milk, mixing until smooth and combined.
3. Bake the Cupcakes:
Spoon the batter into the cupcake liners, filling each about 2/3 full. Bake for 18-20 minutes, or until a toothpick inserted into the center comes out clean.
Allow the cupcakes to cool in the pan for 5 minutes before transferring them to a wire rack to cool completely.
4. Make the Frosting:
While the cupcakes are cooling, make the frosting. Beat the butter in a large bowl until smooth and creamy. Gradually add the powdered sugar, vanilla extract, and heavy cream (or milk), and beat until the frosting is fluffy and smooth.
Divide the frosting into three bowls.
- In the first bowl, add a few drops of red food coloring and mix until you get a vibrant red color.
- In the second bowl, add a few drops of blue food coloring to create a bright blue.
- Leave the third bowl as-is for the white layer.
5. Pipe the Frosting onto the Cupcakes:
Once the cupcakes have cooled completely, pipe the frosting onto the cupcakes in layers. Use a large piping tip (like a star tip or round tip) to pipe the red frosting onto the bottom of each cupcake.
Then, pipe the white frosting in the middle and the blue frosting on top. You can either pipe the layers separately or swirl them together for a marbled effect.
For extra snow cone authenticity, top each cupcake with a mini cone and finish off with some rainbow sprinkles for that extra pop of color.
6. Chill and Serve:
Let the cupcakes chill in the fridge for about 1 hour to allow the frosting to set properly. This will help maintain the perfect shape for the frosting layers. Once chilled, the cupcakes are ready to be served.
Variations of This Recipe:
- Fruit-Flavored Frosting: Add a few drops of fruit extract (like cherry, blue raspberry, or lime) to the frosting for extra flavor, mimicking the taste of snow cones.
- Different Color Combinations: Use other color combinations for birthday parties or different seasonal events. For example, pink, green, and yellow for a tropical theme or orange, purple, and green for Halloween!
- Mini Snow Cone Cupcakes: Make mini versions of these cupcakes by using a mini muffin tin and mini cones as toppers.
Expert Tips About This Recipe:
- Whipped Frosting: If you want your frosting to be extra light and fluffy, add an extra 2 tablespoons of heavy cream or milk to loosen up the texture and make it easier to pipe.
- Cool the Cupcakes Completely: Make sure the cupcakes are completely cooled before frosting to avoid the frosting melting or becoming too soft.
- Chill the Frosting: If you find the frosting too soft to pipe, place it in the fridge for 10-15 minutes to firm up before piping.
FAQs
Q: Can I use store-bought frosting for this recipe?
A: Yes! If you’re short on time, you can use store-bought frosting. Just make sure to color it with the appropriate food coloring and layer it as directed.
Q: How can I make these cupcakes ahead of time?
A: You can make the cupcakes and frost them a day or two ahead of time. Keep them in an airtight container in the fridge until you’re ready to serve.
Q: Can I freeze these cupcakes?
A: Yes, you can freeze the cupcakes. Freeze the cupcakes (without the frosting) in an airtight container for up to 2 months. When you’re ready to serve, defrost and add the frosting.
Snow Cone Cupcakes
Ingredients
Method
- Preheat your oven to 350°F (175°C) and line a 12-cup muffin tin with cupcake liners.
- In a medium bowl, whisk together the flour, baking powder, and salt. Set aside.
- In a large bowl, beat the butter and sugar together until light and fluffy, about 3-4 minutes. Add the eggs, one at a time, followed by the vanilla extract.
- Gradually add the dry ingredients to the wet ingredients, alternating with the milk, mixing until smooth.
- Spoon the batter into the cupcake liners, filling each about 2/3 full. Bake for 18-20 minutes, or until a toothpick inserted into the center comes out clean.
- Allow the cupcakes to cool in the pan for 5 minutes before transferring them to a wire rack to cool completely.
- Beat the butter in a large bowl until smooth and creamy. Gradually add the powdered sugar, vanilla extract, and heavy cream (or milk), and beat until the frosting is fluffy and smooth.
- Divide the frosting into three bowls.
- Add red food coloring to one, blue food coloring to another, and leave the third bowl as-is for the white layer.
- Once the cupcakes have cooled completely, pipe the frosting onto the cupcakes in layers. Start with the red frosting on the bottom, followed by the white layer, and finish with the blue frosting on top. You can either pipe the layers separately or swirl them together for a marbled effect.
- For extra snow cone authenticity, top each cupcake with a mini cone and finish off with some rainbow sprinkles for that extra pop of color.
- Let the cupcakes chill in the fridge for about 1 hour to allow the frosting to set properly. Once chilled, the cupcakes are ready to be served.