Fresh Summer Charcuterie Cups with Juicy Seasonal Fruit
I absolutely love putting together these Charcuterie Cups With Fresh Summer Fruit whenever I’m hosting or even just craving something light and beautiful. There’s something so satisfying about combining sweet, juicy fruit with savory bites in a perfectly portioned cup.
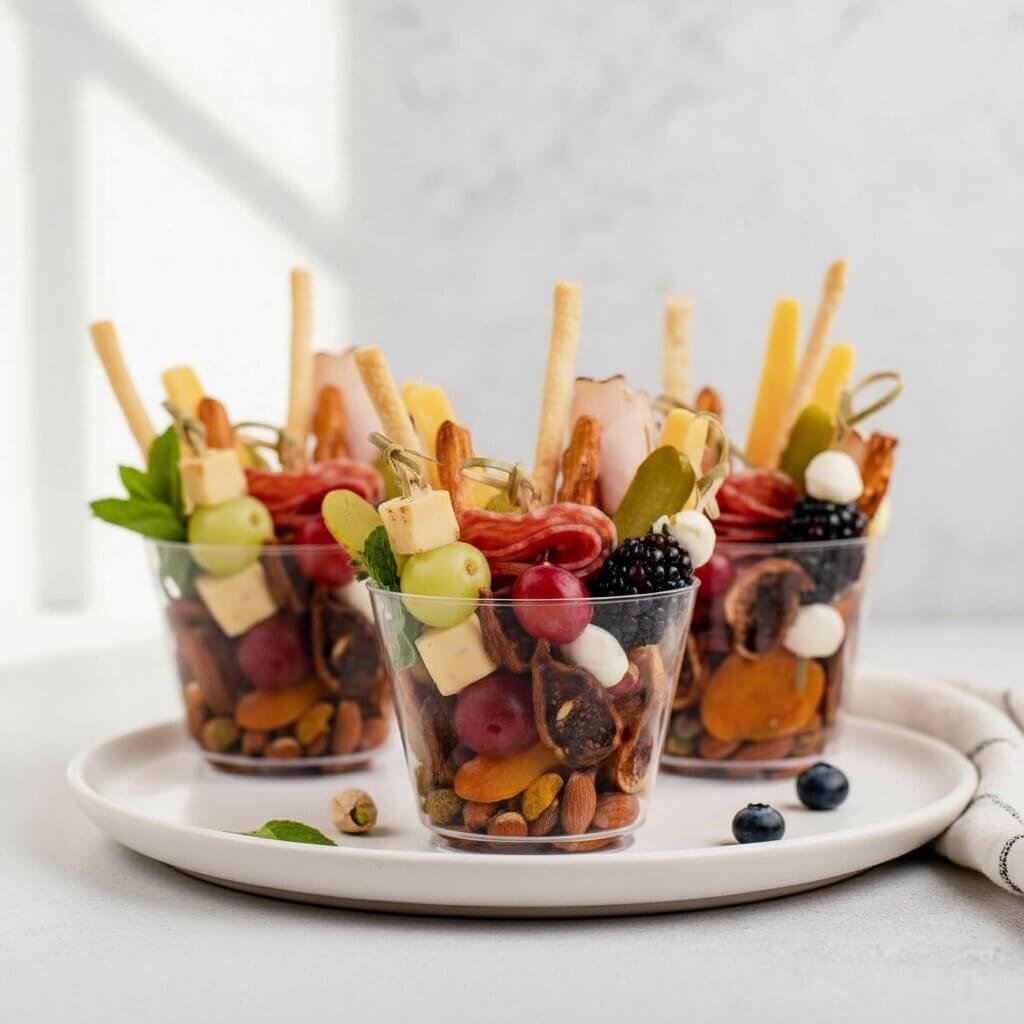
It feels effortless but looks like you spent hours styling it. I often make these for summer gatherings, picnics, or even casual family evenings because they’re easy to customize and always impress guests.
Plus, there’s no cooking involved, which is a huge win on hot days. Every time I serve these, they disappear quickly, and I’m always asked how I made them look so pretty.
Why You’ll Love This Recipe
- Effortless to Assemble: No cooking required—just slice, arrange, and serve in minutes.
- Perfect Sweet & Savory Balance: Fresh fruits paired with cheeses and cured meats create a delicious contrast.
- Simple, Fresh Ingredients: Uses easy-to-find summer produce and pantry-friendly additions.
- Great for Any Occasion: Ideal for parties, picnics, brunches, or even light snacks.
- Customizable for Everyone: Easily adjust ingredients for dietary preferences or what you have on hand.
Charcuterie Cups With Fresh Summer Fruit
Ingredients
Method
- Wash and thoroughly dry all fruits.
- Prepare cheese by cutting into small cubes or slices.
- Fold or roll cured meats into bite-sized portions.
- Place breadsticks or crackers into each cup as a base.
- Add skewers with fruit pieces for height and structure.
- Fill in with cheese cubes, grapes, and nuts.
- Tuck in folded meats and additional fruit pieces to fill gaps.
- Garnish with fresh herbs if desired and serve immediately.
Notes
- Store assembled cups in the refrigerator for up to 4 hours before serving.
- Swap fruits based on seasonality or preference.
- Add dips like honey or yogurt at the bottom for extra flavor.
- Keep chilled until ready to serve, especially in warm weather.
Pro Tips
- Use clear cups to show off the beautiful layers and colors.
- Start with sturdier items like breadsticks or skewers as the base.
- Choose a mix of textures—soft cheese, crisp fruit, and crunchy crackers.
- Keep fruit dry to prevent sogginess in the cups.
- Slice cheese into bite-sized pieces for easy grabbing.
- Add a small folded napkin underneath if serving outdoors for stability.
- Assemble close to serving time for maximum freshness.
- Use wooden skewers to hold smaller items neatly together.
FAQs
1. Can I make charcuterie cups ahead of time?
Yes, you can prep ingredients in advance, but assemble them 1–2 hours before serving for the freshest look.
2. What fruits work best for this recipe?
Berries, grapes, melon, and cherries are great because they’re easy to serve and hold their shape.
3. How do I keep the ingredients from shifting?
Use skewers and layer strategically, starting with heavier items at the bottom.
4. Can I make these vegetarian?
Absolutely. Just skip the meats and add more cheese, nuts, or extra fruit.
5. What size cups should I use?
Small 9–12 oz clear cups work best for individual servings and presentation.