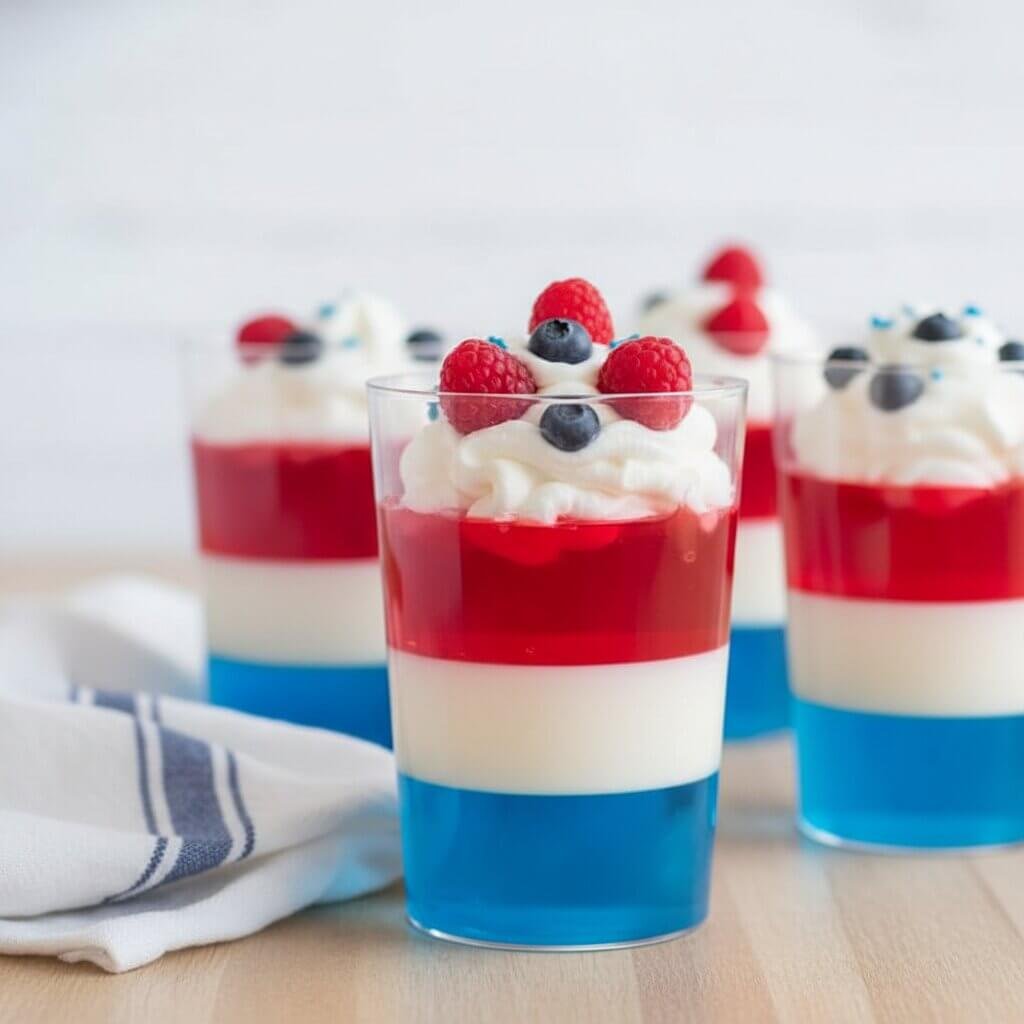
Patriotic Red, White, and Blue Layered Jello Cups
I always find myself making these patriotic jello cups layered whenever I want a dessert that feels festive but still incredibly easy. There’s something so satisfying about watching those bright red, creamy white, and deep blue layers come together so neatly in a cup.
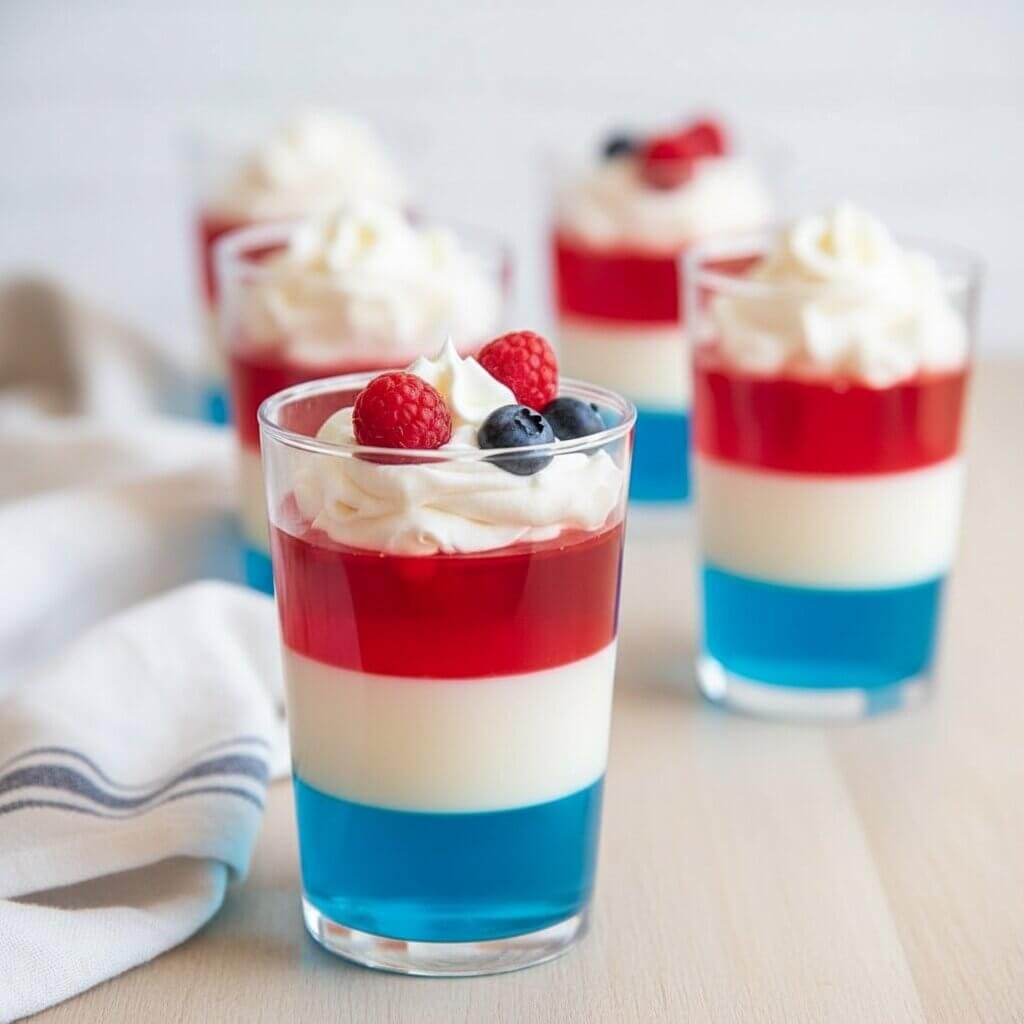
It instantly adds a fun, celebratory touch to any table. I especially love making these for summer gatherings, because they’re light, refreshing, and perfect for warm weather. Plus, they’re a great make-ahead dessert, which takes the stress out of hosting.
Every time I serve them, they disappear quickly, and people always ask how I got those clean layers. The truth is, they’re much simpler than they look.
Why You’ll Love This Recipe
- Beautiful layered look: The vibrant red, white, and blue layers create a stunning presentation with minimal effort.
- Easy to make ahead: You can prepare these hours or even a day in advance, making them perfect for parties.
- Simple ingredients: Just a few basic items like gelatin, water, and whipped topping are all you need.
- Light and refreshing: This dessert is cool, slightly sweet, and perfect for hot weather.
- Perfect for celebrations: Ideal for patriotic holidays, summer BBQs, or any festive gathering.
Patriotic Jello Cups Layered
Ingredients
Method
- Prepare the red gelatin by mixing it with 1 cup boiling water until dissolved, then stir in 1/2 cup cold water.
- Pour a layer into each cup and refrigerate for 30–45 minutes until set.
- In a small bowl, dissolve unflavored gelatin in 1/2 cup hot water. Let it cool slightly, then mix with whipped topping to create the white layer.
- Spoon or gently pour the white mixture over the set red layer. Chill again until firm.
- Prepare the blue gelatin the same way as the red. Let it cool slightly before adding.
- Carefully pour the blue layer on top of the white layer.
- Refrigerate for at least 2–3 hours or until fully set.
- Serve chilled and enjoy.
Notes
- Store covered in the refrigerator for up to 3 days.
- For extra decoration, top with fresh berries or additional whipped cream before serving.
- You can swap flavors or colors for different occasions while using the same method.
Pro Tips
- Let each layer fully set before adding the next to keep layers clean and defined.
- Chill cups in the fridge on a flat surface to prevent uneven layers.
- Use clear cups to show off the beautiful layers.
- Slightly cool the gelatin before pouring to avoid melting the previous layer.
- Use a spoon to gently pour layers and prevent mixing.
- For the white layer, mix whipped topping with unflavored gelatin for stability.
- Don’t rush the process—patience gives the best visual results.
- Cover cups with plastic wrap if chilling overnight to keep them fresh.
FAQs
1. How long does each layer need to set?
Each layer usually takes about 30–45 minutes in the fridge to firm up properly.
2. Can I use homemade whipped cream instead of store-bought?
Yes, but stabilize it with a little gelatin so it holds its shape between layers.
3. What size cups work best?
Small clear plastic cups or dessert glasses (5–9 oz) work perfectly.
4. Can I make these a day in advance?
Yes, they actually hold up very well overnight when covered and refrigerated.
5. Why are my layers mixing together?
This usually happens if the previous layer hasn’t fully set or the new layer is too warm.