15 Picnic Foods That Don’t Need Refrigeration
Planning a picnic should feel relaxing—not stressful. That’s why having a list of picnic foods that don’t need refrigeration is a total game-changer. Whether you’re heading to the park, beach, or a long road trip, these no-fridge picnic ideas keep things simple, safe, and delicious.
This roundup is packed with easy picnic foods that are portable, mess-free, and full of flavor. From savory bites to satisfying snacks, each recipe is designed to hold up well at room temperature without compromising taste or texture. You’ll find beginner-friendly recipes, budget-conscious ingredients, and crowd-pleasing options perfect for families, couples, or solo outings.
If you’re looking for make-ahead picnic food ideas that travel well and stay fresh, you’re in the right place. Let’s dive into the first batch of easy, no-refrigeration picnic recipes.
#1: Classic Peanut Butter Banana Roll-Ups
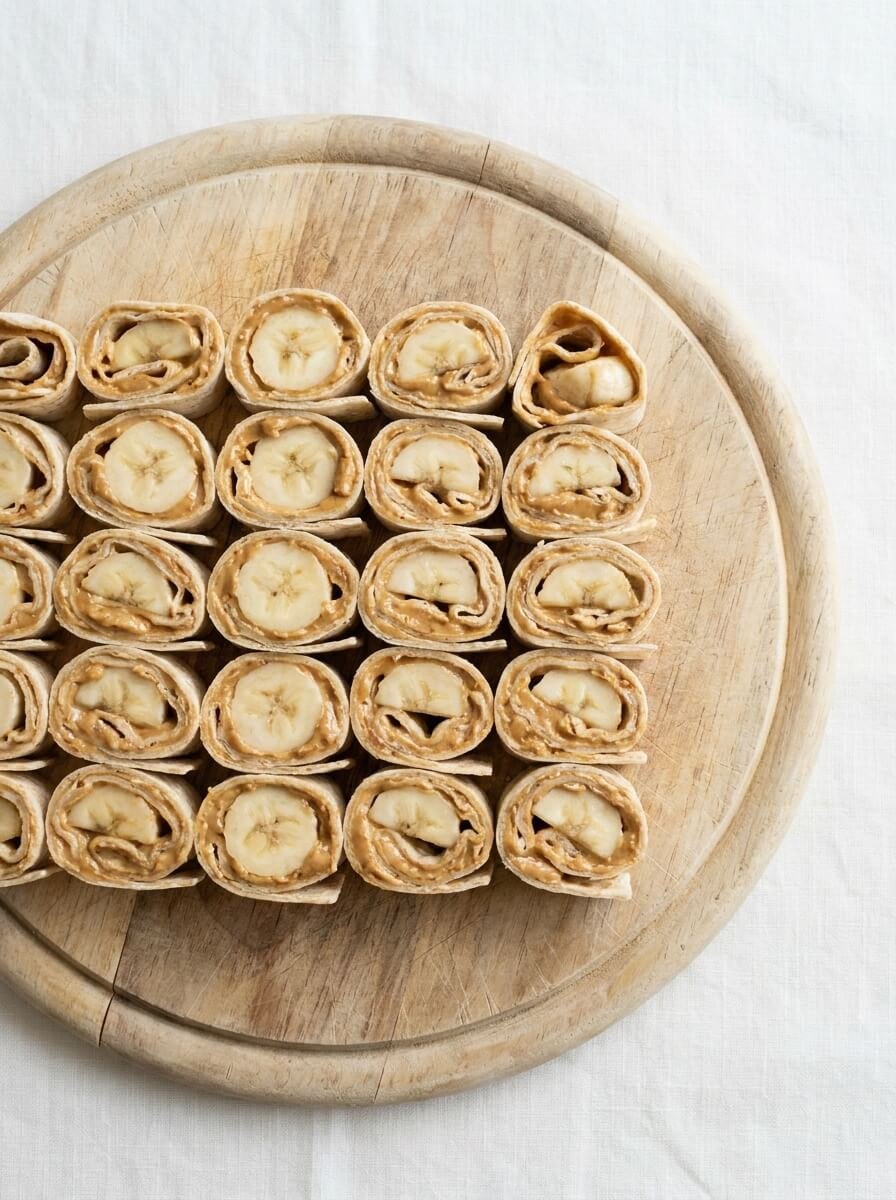
Soft, creamy, and slightly sweet, these peanut butter banana roll-ups are a perfect grab-and-go picnic snack. The combination of smooth peanut butter and ripe banana creates a satisfying texture with a hint of natural sweetness.
What makes these special is how quick and mess-free they are. Ideal for kids and adults alike, they hold up well without refrigeration and don’t require utensils. Serve them as a light snack or a quick energy boost during outdoor activities.
Ingredients
- 4 large flour tortillas
- 1 cup creamy peanut butter
- 2 ripe bananas
- 1 tablespoon honey (optional)
- 1/2 teaspoon cinnamon (optional)
Instructions
- Lay each tortilla flat on a clean surface.
- Spread a generous layer of peanut butter evenly across the tortilla.
- Place a peeled banana at one edge of the tortilla.
- Drizzle honey and sprinkle cinnamon if using.
- Roll the tortilla tightly around the banana.
- Slice into 1–2 inch pieces or keep whole for easy transport.
#2: Savory Cheddar Herb Muffins

These savory muffins are soft, fluffy, and packed with cheesy, herby flavor. They’re the perfect alternative to sweet baked goods and offer a satisfying, slightly crumbly texture.
They’re great for picnics because they don’t spoil quickly and taste just as good at room temperature. Serve them as a side, snack, or even a light lunch option.
Ingredients
- 2 cups all-purpose flour
- 1 tablespoon baking powder
- 1/2 teaspoon salt
- 1/2 teaspoon black pepper
- 1 cup shredded cheddar cheese
- 1 tablespoon chopped fresh parsley (or 1 teaspoon dried)
- 1 cup milk
- 1/3 cup vegetable oil
- 1 large egg
Instructions
- Preheat oven to 375°F (190°C) and line a muffin tin.
- In a bowl, mix flour, baking powder, salt, and pepper.
- Stir in cheese and herbs.
- In another bowl, whisk milk, oil, and egg.
- Combine wet and dry ingredients until just mixed.
- Spoon batter into muffin cups.
- Bake for 18–20 minutes until golden.
- Cool completely before packing for your picnic.
#3: Crunchy Chickpea Snack Mix
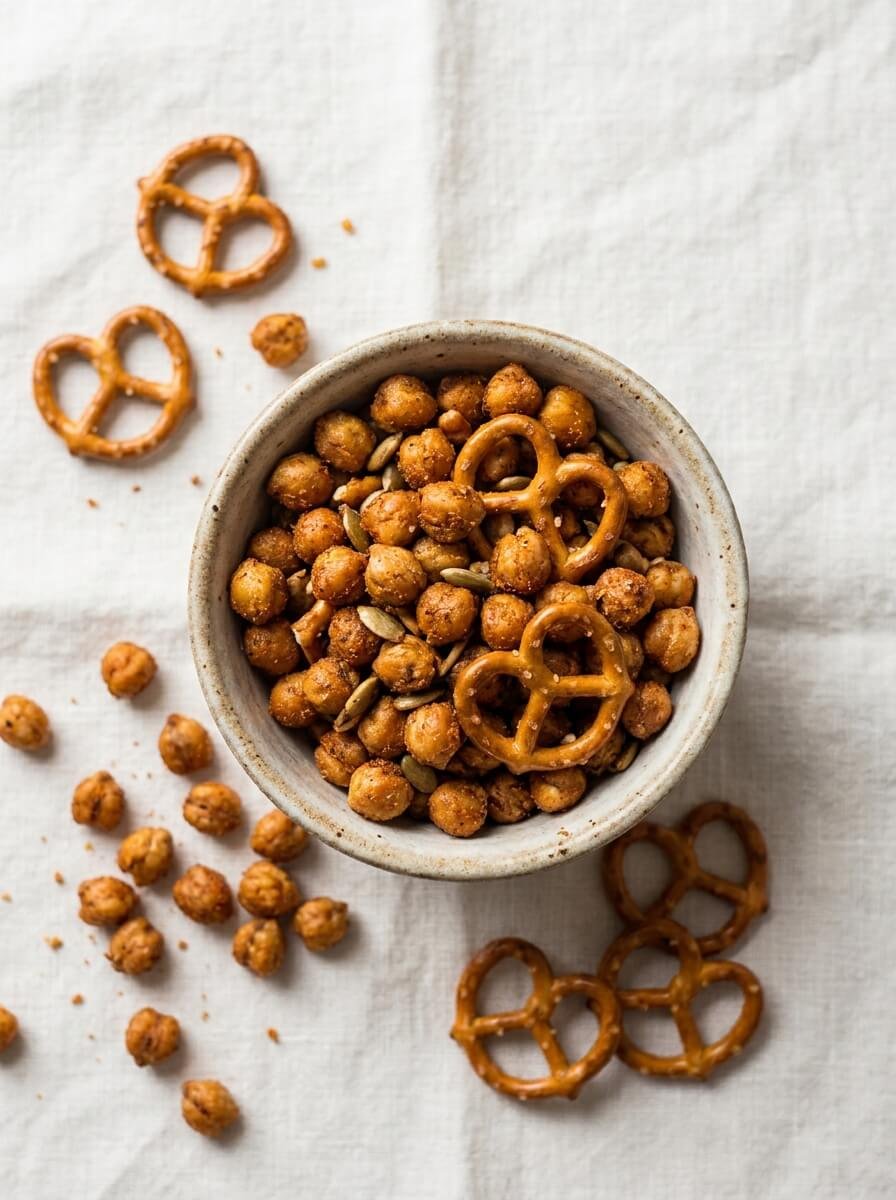
This crunchy snack mix is savory, nutty, and slightly spiced—perfect for munching outdoors. The roasted chickpeas add a satisfying crunch, while the seasoning brings bold flavor.
It’s a high-protein, shelf-stable option that’s easy to make in batches. Great for long picnics, hikes, or road trips where refrigeration isn’t available.
Ingredients
- 2 cups canned chickpeas (drained and dried)
- 1 tablespoon olive oil
- 1/2 teaspoon salt
- 1/2 teaspoon paprika
- 1/4 teaspoon garlic powder
- 1/4 teaspoon cumin
- 1/2 cup roasted peanuts
- 1/2 cup pretzels
Instructions
- Preheat oven to 400°F (200°C).
- Pat chickpeas dry thoroughly with a towel.
- Toss with olive oil and spices.
- Spread on a baking sheet in a single layer.
- Roast for 25–30 minutes until crispy.
- Let cool completely.
- Mix with peanuts and pretzels.
- Store in an airtight container for your picnic.
#4: Honey Oat Energy Bars
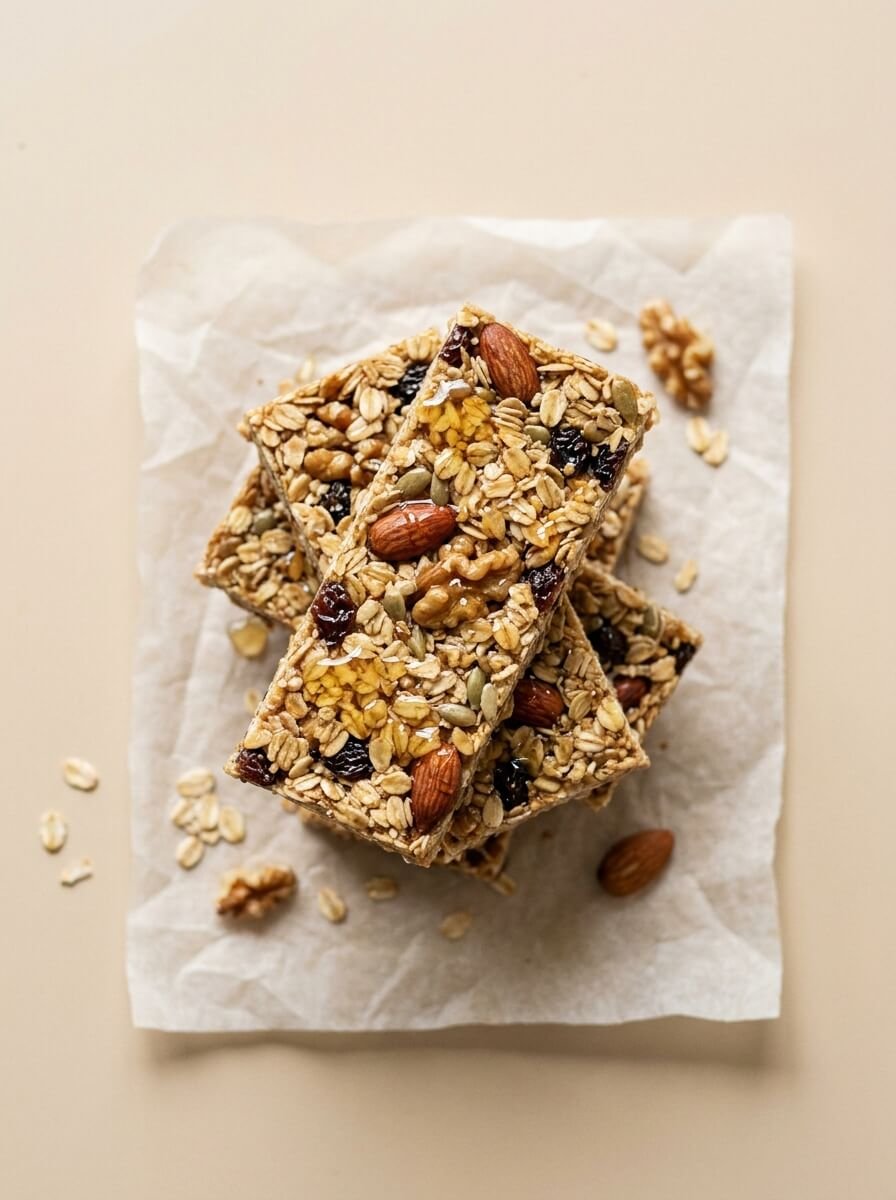
These chewy energy bars are naturally sweet, slightly nutty, and packed with wholesome ingredients. The oats provide a hearty texture, while honey binds everything together.
They’re perfect for picnics because they don’t melt or spoil easily. Great as a quick snack, breakfast-on-the-go, or a mid-day energy boost.
Ingredients
- 2 cups rolled oats
- 1/2 cup honey
- 1/2 cup peanut butter
- 1/3 cup chopped nuts (almonds or peanuts)
- 1/4 cup dried fruit (raisins or cranberries)
- 1 teaspoon vanilla extract
Instructions
- In a saucepan, warm honey and peanut butter until smooth.
- Remove from heat and stir in vanilla.
- In a bowl, combine oats, nuts, and dried fruit.
- Pour the warm mixture over dry ingredients.
- Mix thoroughly until coated.
- Press into a lined baking dish.
- Chill until firm, then cut into bars.
- Wrap individually for easy transport.
#5: Mini Jam Hand Pies
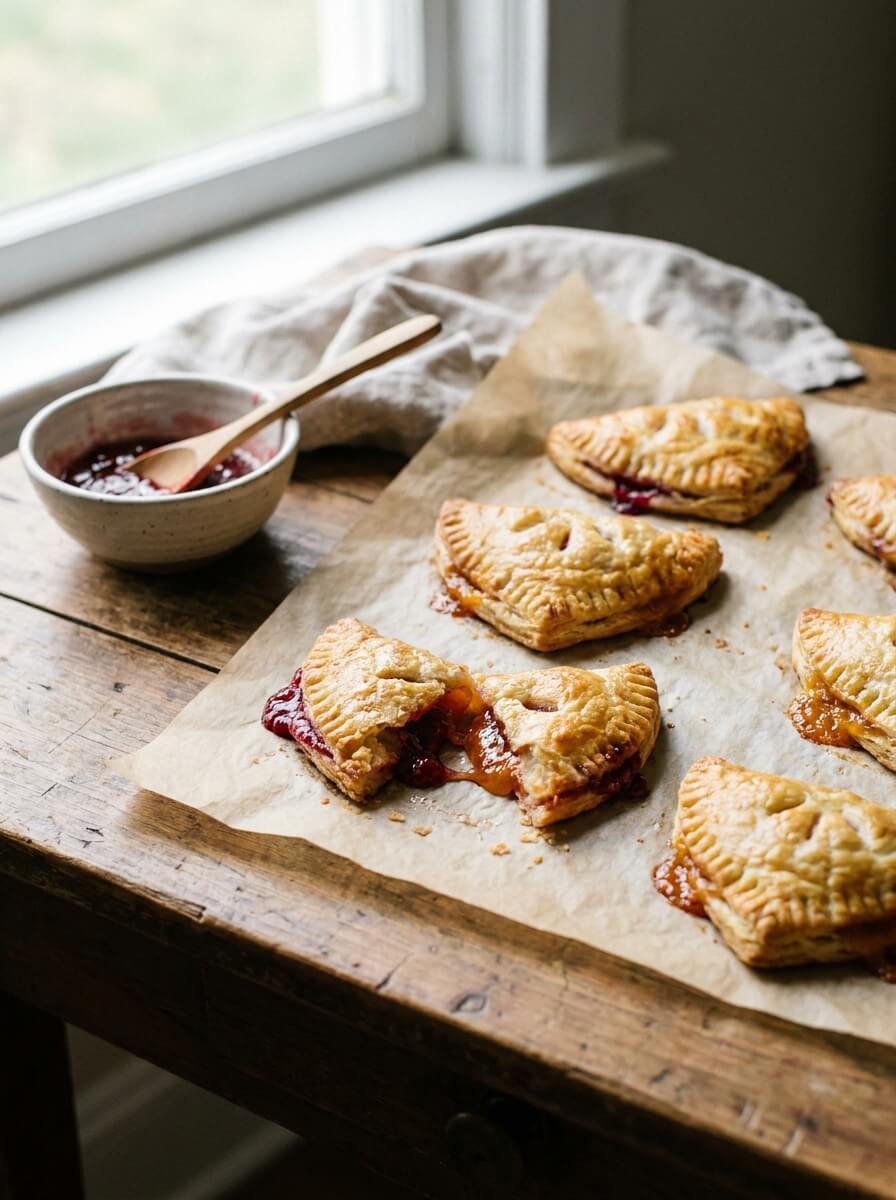
These mini hand pies are flaky, slightly crisp, and filled with sweet, fruity jam. They’re like portable desserts that don’t require refrigeration.
What makes them ideal for picnics is their durability and portion size. Easy to pack, share, and enjoy without utensils—perfect for a sweet treat outdoors.
Ingredients
- 2 sheets refrigerated pie crust
- 1/2 cup fruit jam (strawberry, blueberry, or apricot)
- 1 egg (beaten)
- 1 tablespoon sugar
Instructions
- Preheat oven to 375°F (190°C).
- Roll out pie crusts and cut into small circles.
- Place a teaspoon of jam in the center of half the circles.
- Top with remaining circles and seal edges with a fork.
- Brush tops with beaten egg and sprinkle sugar.
- Cut small slits for ventilation.
- Bake for 18–22 minutes until golden brown.
- Cool completely before packing.
#6: Garlic Parmesan Breadsticks

Crispy on the outside and soft on the inside, these garlic parmesan breadsticks are packed with savory flavor. The buttery garlic coating combined with cheesy goodness makes them incredibly addictive.
They’re perfect for picnics because they stay fresh at room temperature and don’t require any dips or refrigeration. Serve them as a snack, side, or even alongside other picnic dishes.
Ingredients
- 1 tube refrigerated pizza dough
- 2 tablespoons melted butter
- 2 cloves garlic (minced)
- 1/4 cup grated parmesan cheese
- 1/2 teaspoon Italian seasoning
- 1/4 teaspoon salt
Instructions
- Preheat oven to 400°F (200°C).
- Roll out pizza dough into a rectangle.
- Cut into strips using a knife or pizza cutter.
- Place strips on a lined baking sheet.
- Mix melted butter with minced garlic.
- Brush garlic butter over each strip.
- Sprinkle parmesan, seasoning, and salt on top.
- Bake for 12–15 minutes until golden brown.
- Cool slightly before packing.
#7: Sweet and Spicy Roasted Nuts
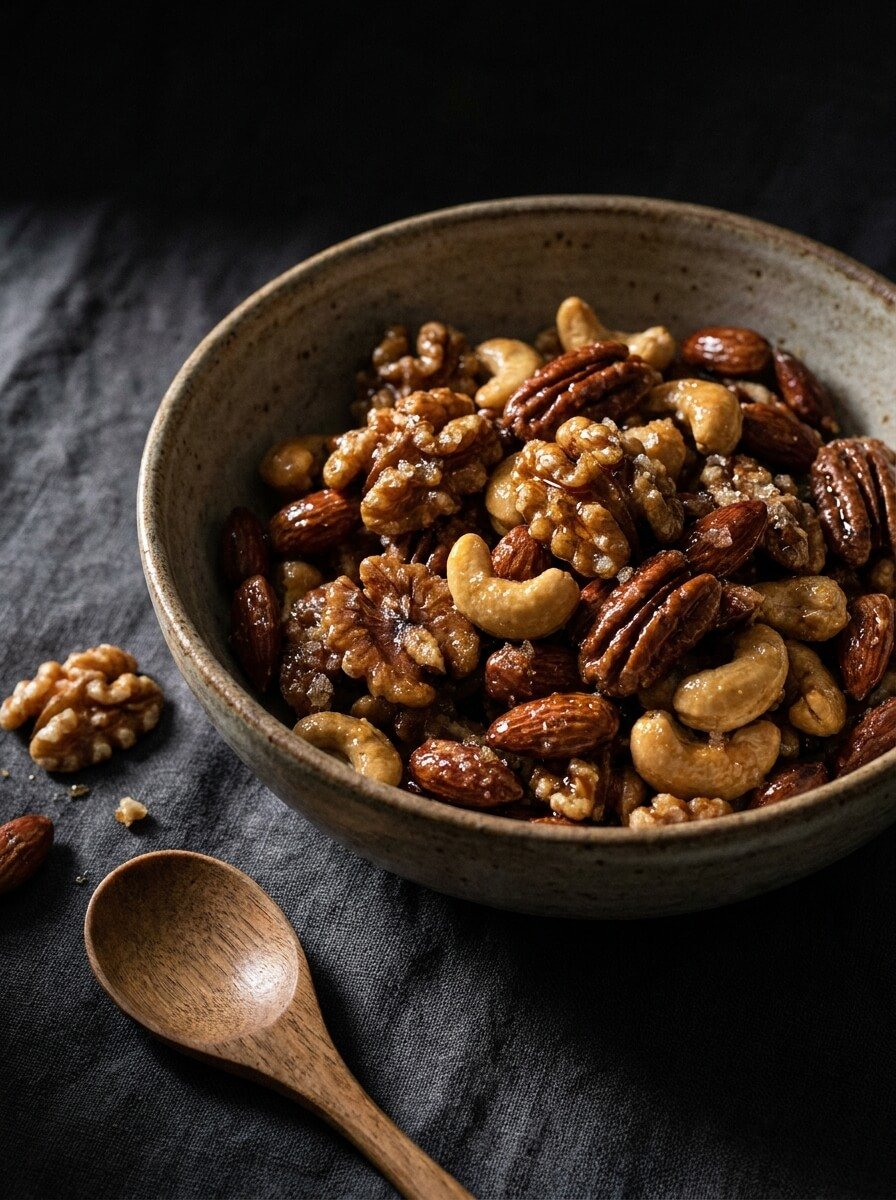
These roasted nuts are crunchy, slightly sweet, and finished with a gentle kick of spice. The balance of flavors makes them a crowd-pleasing snack that’s hard to stop eating.
They’re ideal for no-refrigeration picnics because they store well and stay crisp for hours. Perfect for sharing or portioning into snack bags.
Ingredients
- 2 cups mixed nuts (almonds, cashews, peanuts)
- 2 tablespoons honey
- 1 tablespoon olive oil
- 1/2 teaspoon cayenne pepper
- 1/2 teaspoon cinnamon
- 1/2 teaspoon salt
Instructions
- Preheat oven to 350°F (175°C).
- In a bowl, mix honey, olive oil, and spices.
- Add nuts and toss until evenly coated.
- Spread nuts on a baking sheet.
- Bake for 15–20 minutes, stirring halfway through.
- Remove and let cool completely to crisp up.
- Store in airtight containers for travel.
#8: Classic Italian Pasta Salad (No Mayo)
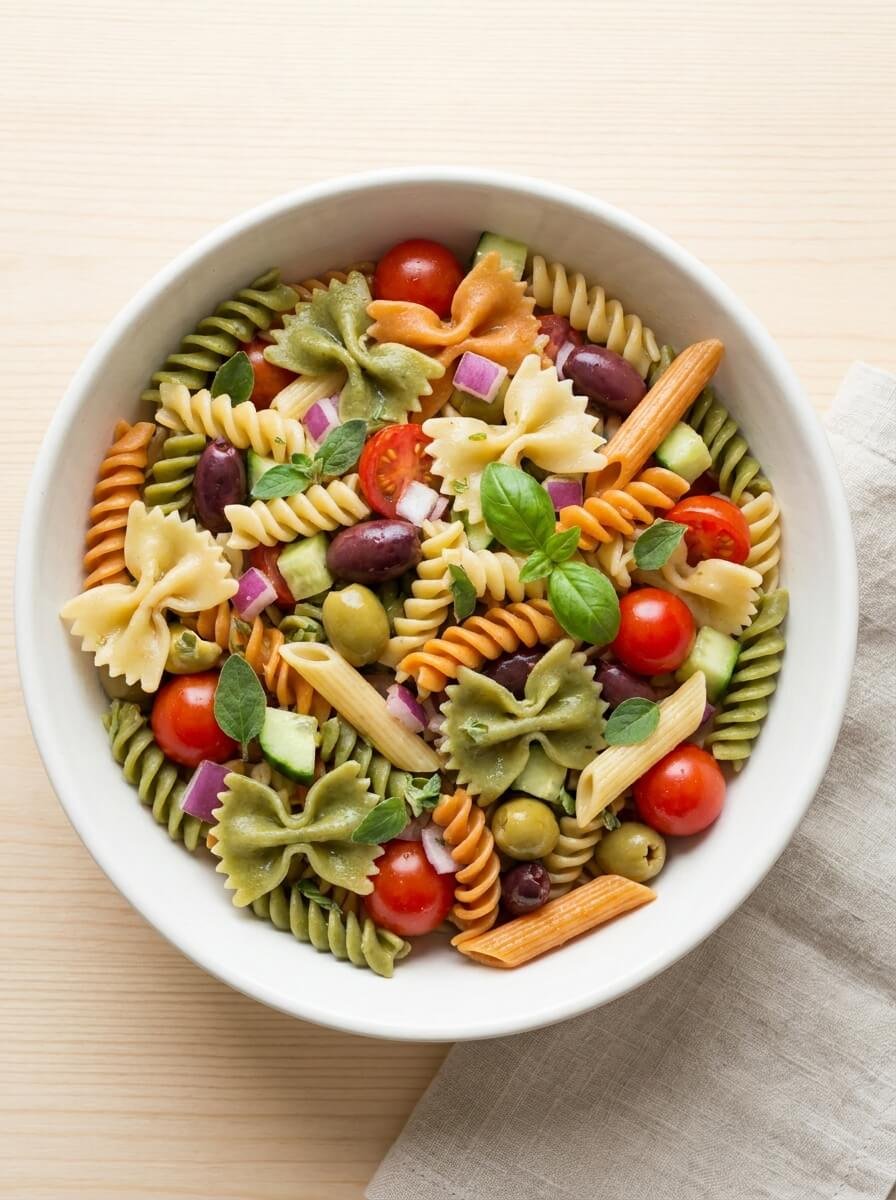
This pasta salad is light, tangy, and packed with bold Italian flavors. With no mayonnaise, it holds up well without refrigeration while still delivering a satisfying bite.
Loaded with veggies and tossed in a simple vinaigrette, it’s refreshing and perfect for warm outdoor settings. Serve it as a main or side dish.
Ingredients
- 3 cups cooked rotini pasta (cooled)
- 1/2 cup cherry tomatoes (halved)
- 1/4 cup black olives (sliced)
- 1/4 cup red onion (finely chopped)
- 1/4 cup diced bell peppers
- 1/3 cup Italian dressing
- 1/2 teaspoon dried oregano
- Salt and pepper to taste
Instructions
- Cook pasta according to package directions, then cool completely.
- In a large bowl, combine pasta, tomatoes, olives, onion, and peppers.
- Pour Italian dressing over the mixture.
- Sprinkle oregano, salt, and pepper.
- Toss until evenly coated.
- Let sit for 10–15 minutes to absorb flavors.
- Pack in a sealed container for your picnic.
#9: Cinnamon Sugar Tortilla Chips
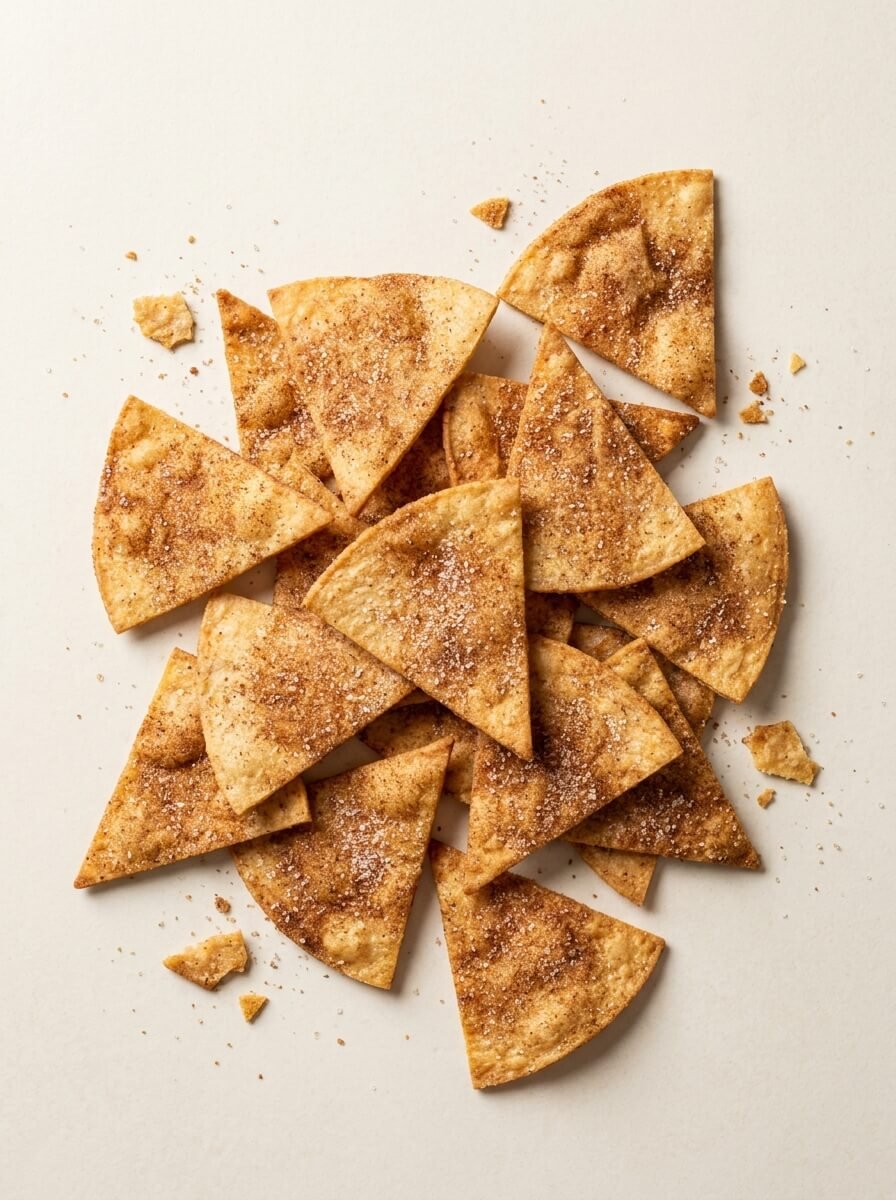
These crispy, sweet tortilla chips are light, crunchy, and coated in warm cinnamon sugar. They offer a dessert-like treat without being overly heavy.
Perfect for picnics, they don’t melt or spoil and can be enjoyed on their own or paired with fruit. Great for both kids and adults.
Ingredients
- 4 flour tortillas
- 2 tablespoons melted butter
- 3 tablespoons sugar
- 1 teaspoon cinnamon
Instructions
- Preheat oven to 350°F (175°C).
- Brush tortillas with melted butter.
- Mix sugar and cinnamon in a bowl.
- Sprinkle mixture evenly over tortillas.
- Cut into triangle shapes.
- Arrange on a baking sheet.
- Bake for 10–12 minutes until crispy.
- Cool completely before storing.
#10: Tuna-Free Picnic Sandwich Spread
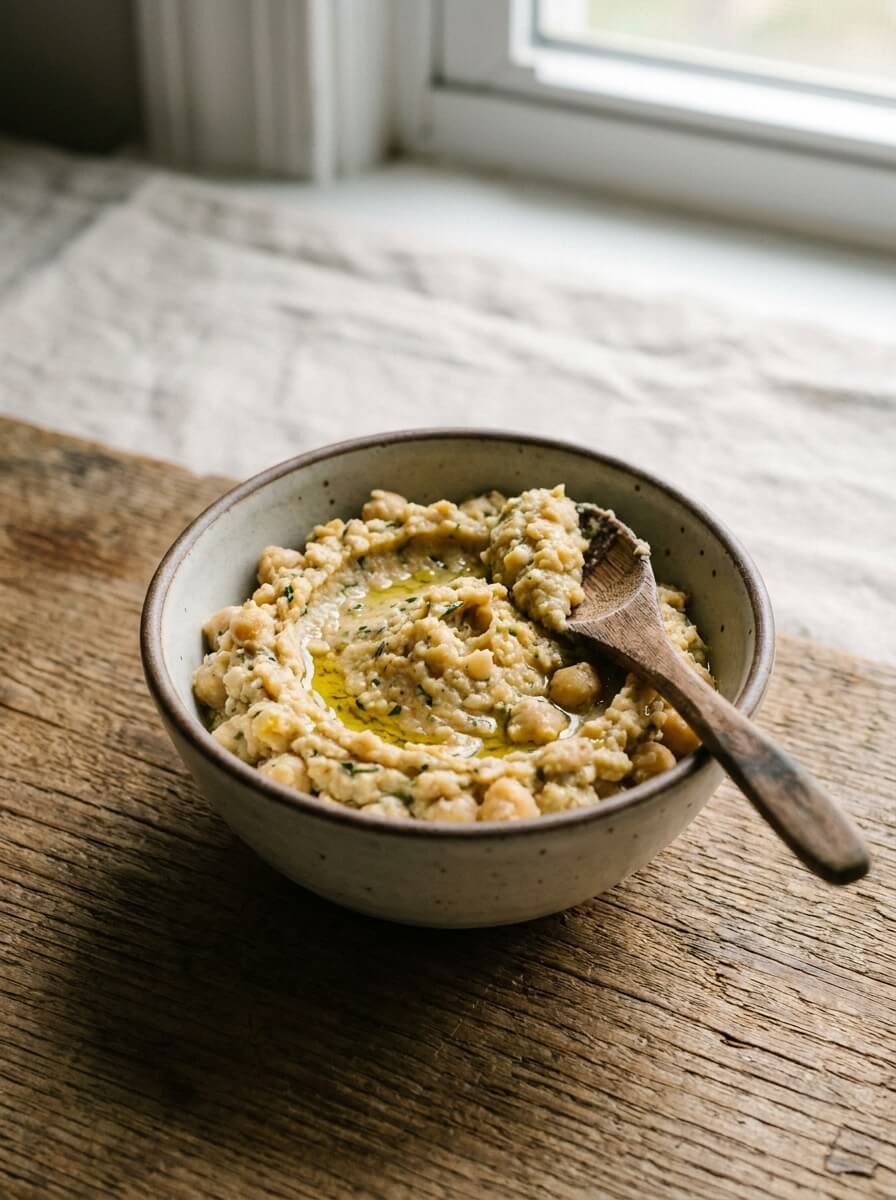
This hearty sandwich spread delivers a savory, slightly tangy flavor with a satisfying texture—without using tuna. Made with mashed chickpeas, it’s a great plant-based alternative.
It’s perfect for picnics because it holds up better than traditional mayo-heavy fillings. Spread it on bread or wraps for a filling, no-refrigeration meal.
Ingredients
- 1 can chickpeas (drained and rinsed)
- 2 tablespoons olive oil
- 1 tablespoon mustard
- 1 tablespoon lemon juice
- 1/4 cup finely chopped celery
- 1/4 teaspoon salt
- 1/4 teaspoon black pepper
Instructions
- Mash chickpeas in a bowl using a fork.
- Add olive oil, mustard, and lemon juice.
- Mix until well combined.
- Stir in chopped celery, salt, and pepper.
- Taste and adjust seasoning if needed.
- Spread onto bread or wraps when ready to serve.
- Store in a sealed container for transport.
#11: Crispy Baked Zucchini Chips
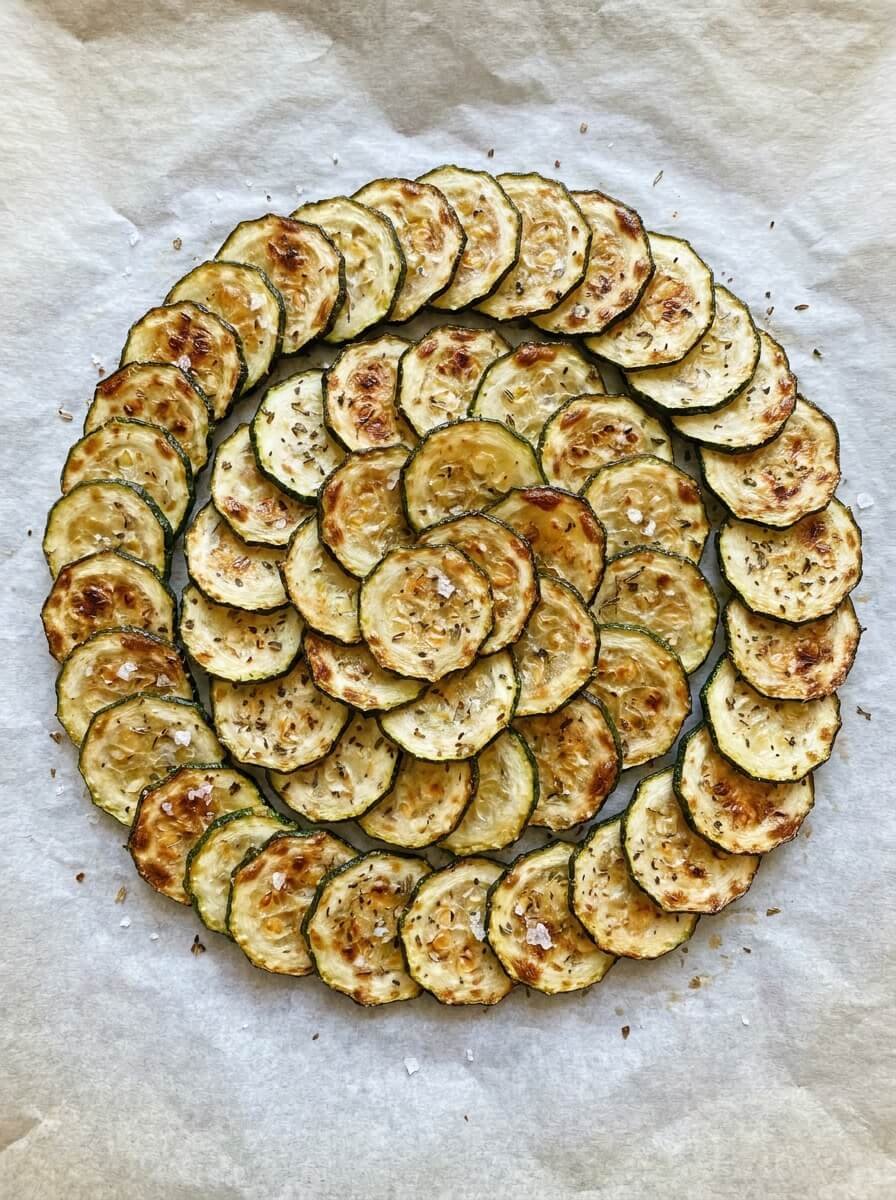
These zucchini chips are light, crispy, and slightly savory with a delicate crunch. They offer a healthier alternative to traditional chips while still satisfying that salty snack craving.
They’re perfect for picnics because they stay crisp when fully cooled and don’t require refrigeration. Serve them as a snack or alongside sandwiches for added texture.
Ingredients
- 2 medium zucchinis (thinly sliced)
- 2 tablespoons olive oil
- 1/4 teaspoon salt
- 1/4 teaspoon black pepper
- 1/4 teaspoon garlic powder
Instructions
- Preheat oven to 250°F (120°C).
- Slice zucchinis into thin, even rounds.
- Pat slices dry with paper towels to remove moisture.
- Toss with olive oil and seasonings.
- Arrange slices in a single layer on a baking sheet.
- Bake for 1.5–2 hours until crisp.
- Let cool completely to achieve maximum crunch.
- Store in an airtight container.
#12: Chocolate Chip Banana Bread Slices
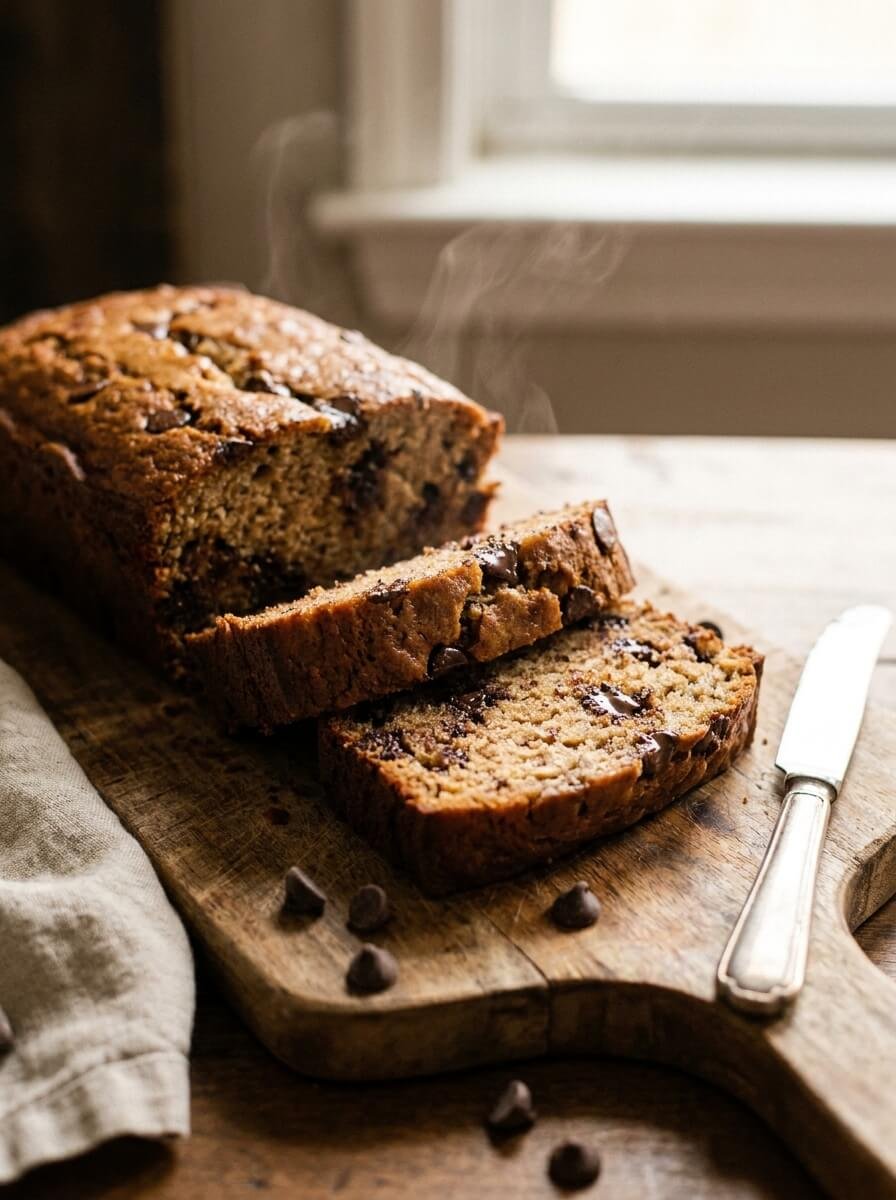
Moist, soft, and filled with rich chocolate chips, these banana bread slices are a classic treat that travels beautifully. The natural sweetness of bananas pairs perfectly with melty chocolate.
They’re ideal for picnics because they stay fresh at room temperature and don’t require any special storage. Serve as a dessert or a sweet snack.
Ingredients
- 2 ripe bananas (mashed)
- 1/2 cup sugar
- 1/3 cup melted butter
- 1 teaspoon vanilla extract
- 1 egg
- 1 teaspoon baking soda
- 1/4 teaspoon salt
- 1 1/2 cups all-purpose flour
- 1/2 cup chocolate chips
Instructions
- Preheat oven to 350°F (175°C).
- In a bowl, mix mashed bananas, sugar, butter, vanilla, and egg.
- Stir in baking soda and salt.
- Add flour and mix until just combined.
- Fold in chocolate chips.
- Pour batter into a greased loaf pan.
- Bake for 50–60 minutes until a toothpick comes out clean.
- Cool completely before slicing and packing.
#13: Savory Puff Pastry Pinwheels

Flaky, buttery, and packed with savory filling, these puff pastry pinwheels are crisp on the outside and soft inside. Each bite delivers layers of flavor and texture.
They’re excellent picnic food because they hold their structure well and taste great even when cooled. Perfect as finger food or a light snack.
Ingredients
- 1 sheet puff pastry (thawed)
- 1/2 cup shredded cheese
- 2 tablespoons tomato sauce or pesto
- 1/4 teaspoon dried oregano
- 1 egg (beaten)
Instructions
- Preheat oven to 375°F (190°C).
- Roll out puff pastry on a flat surface.
- Spread a thin layer of sauce evenly.
- Sprinkle cheese and oregano on top.
- Roll tightly into a log.
- Slice into 1-inch pieces.
- Place on a baking sheet and brush with egg wash.
- Bake for 18–20 minutes until golden and flaky.
- Cool before serving.
#14: No-Bake Coconut Date Balls

These bite-sized treats are chewy, naturally sweet, and packed with coconut flavor. The dates provide a rich caramel-like taste, while coconut adds texture.
They’re perfect for picnics because they don’t melt easily and require no baking. Great for quick energy and easy portioning.
Ingredients
- 1 cup pitted dates
- 1/2 cup shredded coconut
- 1/4 cup almonds or walnuts
- 1 tablespoon cocoa powder (optional)
- 1 teaspoon vanilla extract
Instructions
- Add dates and nuts to a food processor.
- Blend until a sticky mixture forms.
- Add coconut, cocoa powder, and vanilla.
- Blend again until combined.
- Roll into small balls using your hands.
- Coat with extra shredded coconut if desired.
- Store in a sealed container for travel.
#15: Classic Crackers and Hard Cheese Snack Packs
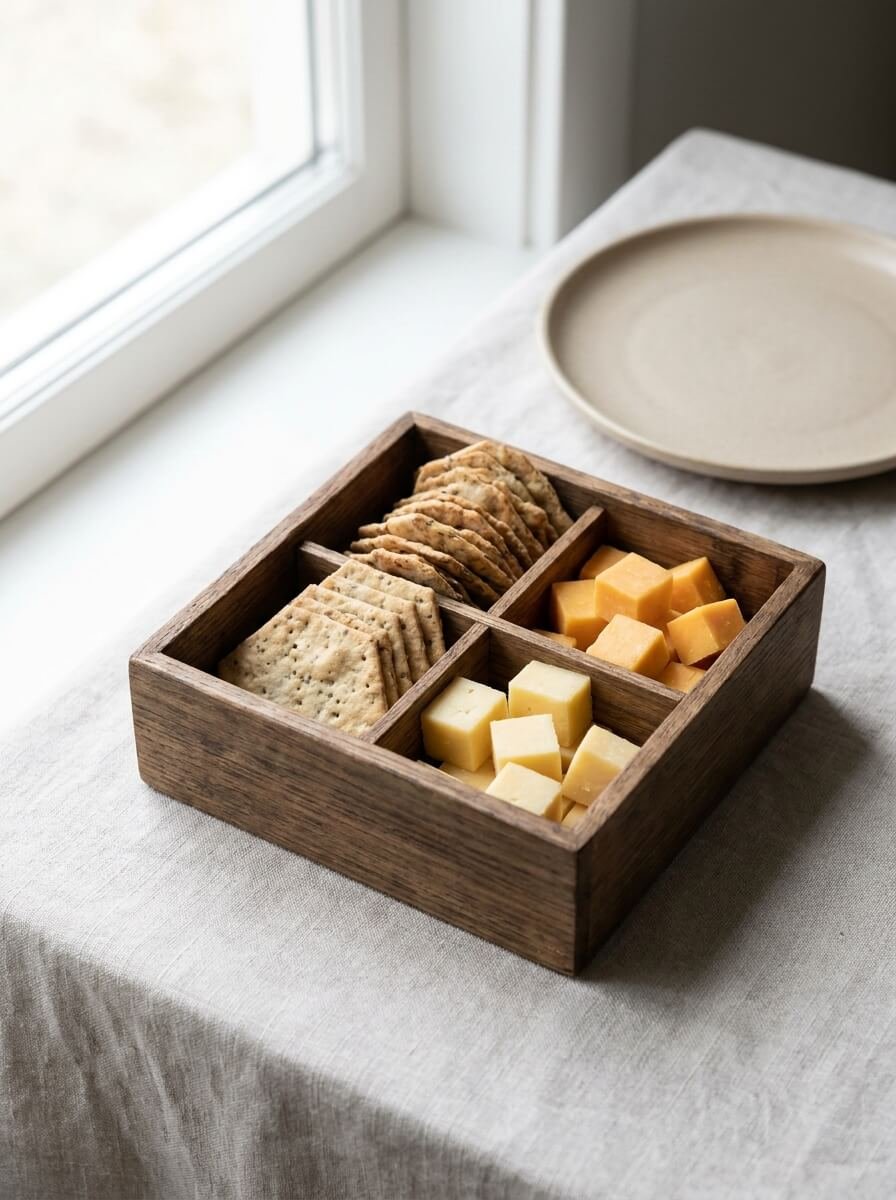
This simple yet satisfying snack combines crunchy crackers with firm, flavorful cheese. The contrast of textures makes it endlessly enjoyable.
Hard cheeses like cheddar or parmesan hold up well without refrigeration for several hours, making this an easy and reliable picnic option. Perfect for assembling quick snack boxes.
Ingredients
- 1 box sturdy crackers
- 8 oz hard cheese (cheddar or parmesan, cubed)
- 1/4 cup nuts (optional)
- 1/4 cup dried fruit (optional)
Instructions
- Cut cheese into small cubes or slices.
- Portion crackers into serving sizes.
- Add nuts and dried fruit if using.
- Arrange everything into snack containers or boxes.
- Keep in a cool, shaded place until ready to eat.