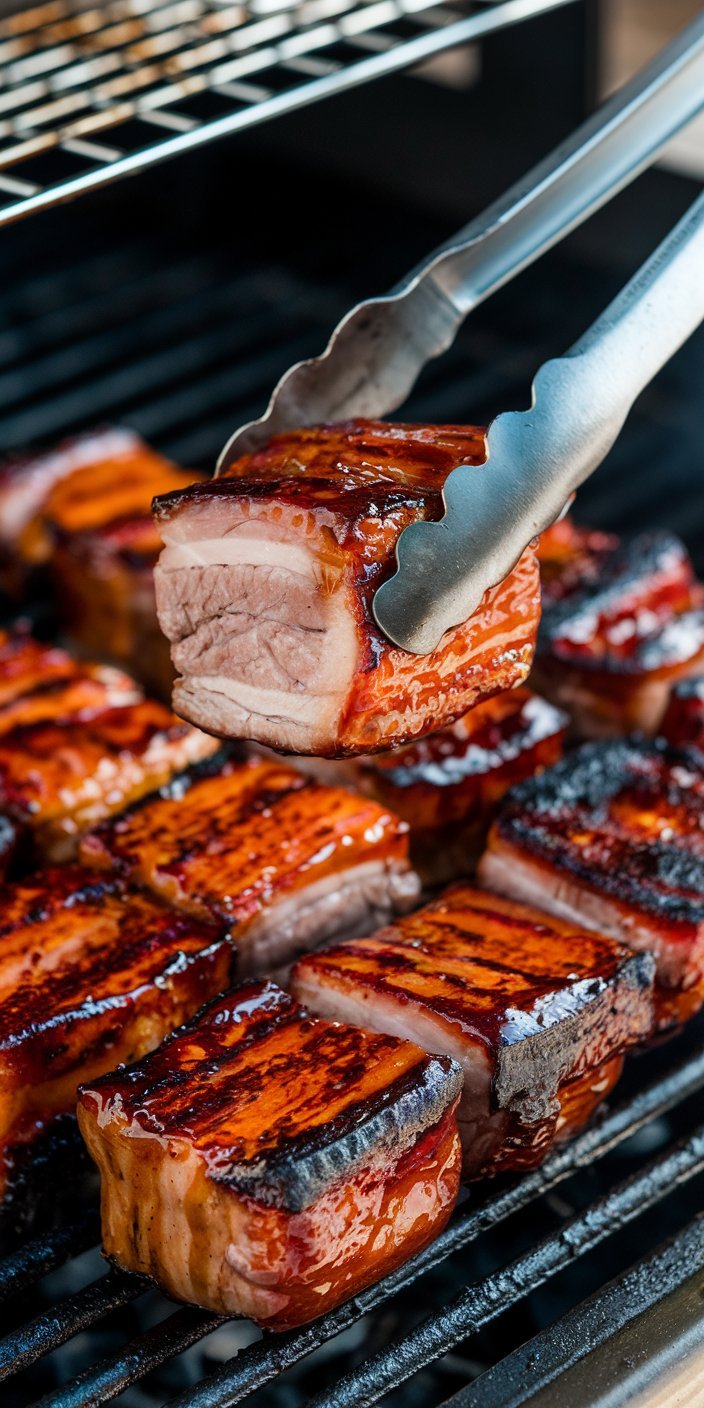
Maple Sriracha Pork Belly Burnt Ends – Sweet, Spicy BBQ Bliss
Sticky, caramelized Maple Sriracha Pork Belly Burnt Ends glistening with a glossy sweet-and-spicy glaze. One summer evening, a backyard BBQ enthusiast set out to wow her friends with a twist on a classic.
She had heard tales of burnt ends – those legendary barbecue bites – and imagined a version with melt-in-your-mouth pork belly. As the pork belly burnt ends sizzled on the grill, the air filled with the intoxicating aroma of maple syrup and Sriracha.
Her guests watched in awe as she lifted the lid, revealing bite-sized nuggets charred at the edges and lacquered in a sticky glaze. When everyone finally dug in, there were smiles all around.
The different textures and the balance of sweet and spicy notes in each bite had folks licking their fingers in delight. That night, trust was earned one delicious piece at a time – and now you can recreate that magic at home!
Why You’ll Love These Maple Sriracha Pork Belly Burnt Ends
- Irresistible Sweet & Spicy Flavor: These pork belly burnt ends are coated in an addictive glaze that combines rich, real maple syrup with zesty Sriracha. It’s a perfect balance – sweet, with a bold kick in every bite (think “barbecue candy” with a spicy twist).
- Melt-in-Your-Mouth Texture: Slow grilling transforms pork belly into tender, buttery-soft cubes with crispy, caramelized edges. Each piece is juicy inside and lightly charred outside, giving you that sought-after BBQ barkand moist center.
- Mostly Hands-Off Cooking: This recipe may take some time, but the grill does most of the work. Once the seasoned pork belly is on the grates, you can relax for a couple of hours as it slowly cooks to perfection. (Good things come to those who wait, especially in BBQ!)
- Crowd-Pleaser at Parties: Maple Sriracha pork belly burnt ends make awesome party bites. Serve them as appetizers with toothpicks or as part of the main course – either way, they’re guaranteed to impress guests at cookouts, game days, or family dinners. Don’t be surprised if they vanish in minutes!
- Versatile & Fun to Serve: Enjoy these burnt ends in lots of ways. Pile them on slider buns with coleslaw for epic BBQ sliders, serve over mashed potatoes or rice for a hearty meal, or even use leftovers in tacos or nachos. You can also adjust the heat to your liking by tweaking the Sriracha, making this recipe flexible for all taste buds.
Ingredients
For the Pork Belly and Dry Rub:
- Pork Belly: ~3–4 pounds pork belly, skin removed (ask your butcher to remove the rind if attached). This cut is essential for its high fat content that turns tender and flavorful.
- Brown Sugar: ½ cup, packed (for the rub). This adds sweetness and helps create a caramelized crust.
- Smoked Paprika: 2 tablespoons. Brings a smoky flavor and a rich red color to the rub.
- Chili Powder or Cayenne: 1 teaspoon (optional, for extra heat). Add if you want a bit more spice in the rub beyond the Sriracha.
- Ground Cumin: 1 teaspoon. Adds a warm, earthy depth to the seasoning.
- Garlic Powder: 1 teaspoon. For savory flavor in the rub.
- Onion Powder: 1 teaspoon. Complements the garlic and savory profile.
- Salt and Black Pepper: 2 teaspoons salt + 1 teaspoon ground black pepper (or to taste). Helps enhance all the flavors and season the meat throughout.
For the Maple Sriracha Glaze:
- Pure Maple Syrup: ½ cup. Use real maple syrup for best flavor and caramelization (avoid artificial pancake syrups) – this is the sweet base of our glaze.
- Sriracha Sauce: ¼ cup (adjust to taste). This popular chili sauce brings the heat and a touch of garlic tang. (Use more or less depending on how spicy you want it.)
- Brown Sugar: 2–4 tablespoons. A little extra brown sugar in the glaze makes it thick and candy-like as it cooks. (You can start with 2 tbsp for less sweetness or go up to 4 for extra sticky-sweet glaze.)
- Unsalted Butter: 3 tablespoons, cut into small cubes. Melts into the glaze, adding richness and helping the burnt ends develop that glossy finish.
- Soy Sauce: 2 tablespoons. Adds umami depth and a bit of saltiness to balance the sweet elements.
- Apple Cider Vinegar: 2 tablespoons. A splash of acidity to brighten the glaze and keep it from being cloyingly sweet. (It also helps tenderize the meat during cooking.)
- Optional Add-Ins: 1 teaspoon Dijon mustard (for tang and complexity) or 1 teaspoon grated ginger (for an extra zing) can be added to the glaze if you want to experiment. These are not required, but can elevate the flavor profile.
Tip: If you don’t have all the individual spices for the rub, you can substitute about ½ cup of your favorite BBQ dry rub seasoning (make sure it contains sugar for caramelization). But the blend above is recommended to complement the maple-sriracha profile.
Step-By-Step Instructions (Grilling Method)
Prep Time: ~30 minutes
Cook Time: ~3½ – 4 hours
Servings: 6–8 (makes about 30+ bite-sized pieces)
Follow these simple steps to create your own batch of sticky-sweet, spicy pork belly burnt ends on the grill. We’ll be using an indirect grilling technique (low and slow heat) to mimic smoking, ensuring the pork becomes ultra tender without burning the sugary glaze.
- Preheat and Set Up the Grill: Preheat your grill to low heat, about 225–250°F. Set up for indirect cooking – this means if you’re using a gas grill, turn on one side burner to low-medium and leave the other side off, or if using charcoal, bank the coals to one side of the grill. Aim for a steady low temperature (the inside of the grill should stay in the 225–250°F range).
This low-and-slow heat will ensure the pork belly renders slowly and stays juicy. If you have wood chips (like hickory or applewood), add a smoker box or a foil pouch of soaked wood chips to the hot side for an extra smoky aroma (optional but awesome!).
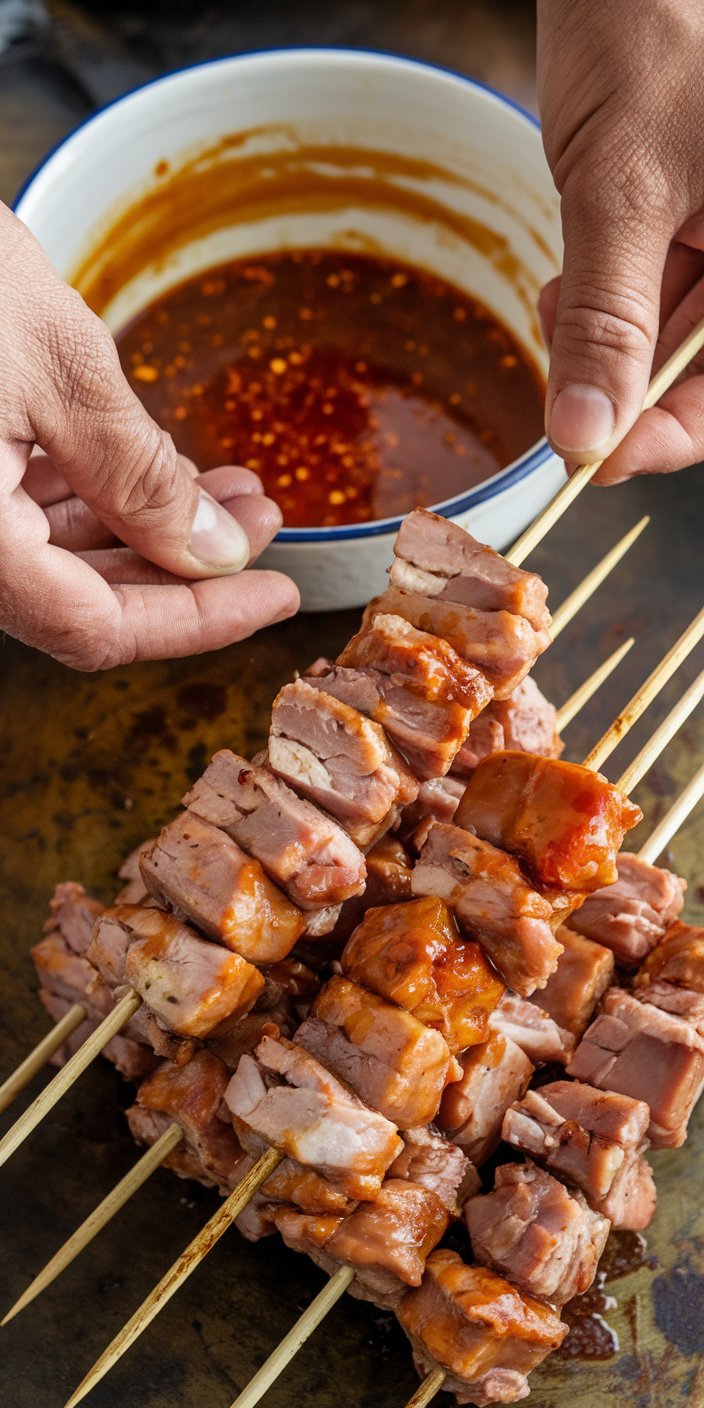
Also, place a drip pan or a sheet of foil under the cool side grate – the pork belly will drip fat, and a drip pan prevents flare-ups and makes cleanup easier. - Prepare the Pork Belly: While the grill is heating, get the pork belly ready. Pat the pork belly dry with paper towels. Trim off any tough skin or excess top fat if not already removed (you want a good bit of fat marbling, but not a thick rubbery skin cap). Using a sharp knife, cut the pork belly into 1½-inch cubes. Aim for uniform pieces so they cook evenly.
In a large bowl, drizzle the pork belly cubes with a little olive oil (about 1–2 tablespoons) – this helps the seasoning stick. In a separate bowl, mix together all the dry rub ingredients: brown sugar, paprika, chili/cayenne, cumin, garlic powder, onion powder, salt, and pepper. Break up any sugar lumps so it’s well combined.
Now sprinkle this rub all over the pork belly cubes, tossing to coat each piece thoroughly. Every side of each cube should get a good coating of the spiced sugar rub. Let the seasoned pork belly sit for 5–10 minutes to absorb the flavors (you can even prep this up to overnight in the fridge for deeper flavor, but 10 minutes at room temp is fine). - Slow-Grill the Pork Belly (Phase 1): Place the pork belly cubes on the cool side of the grill, over indirect heat. They should NOT be directly over the flame or coals. Arrange them with a little space in between each piece so smoke and heat can circulate. Close the grill lid. Cook the pork belly cubes indirectly for about 1½ to 2 hours, maintaining that 225–250°F temperature inside the grill.
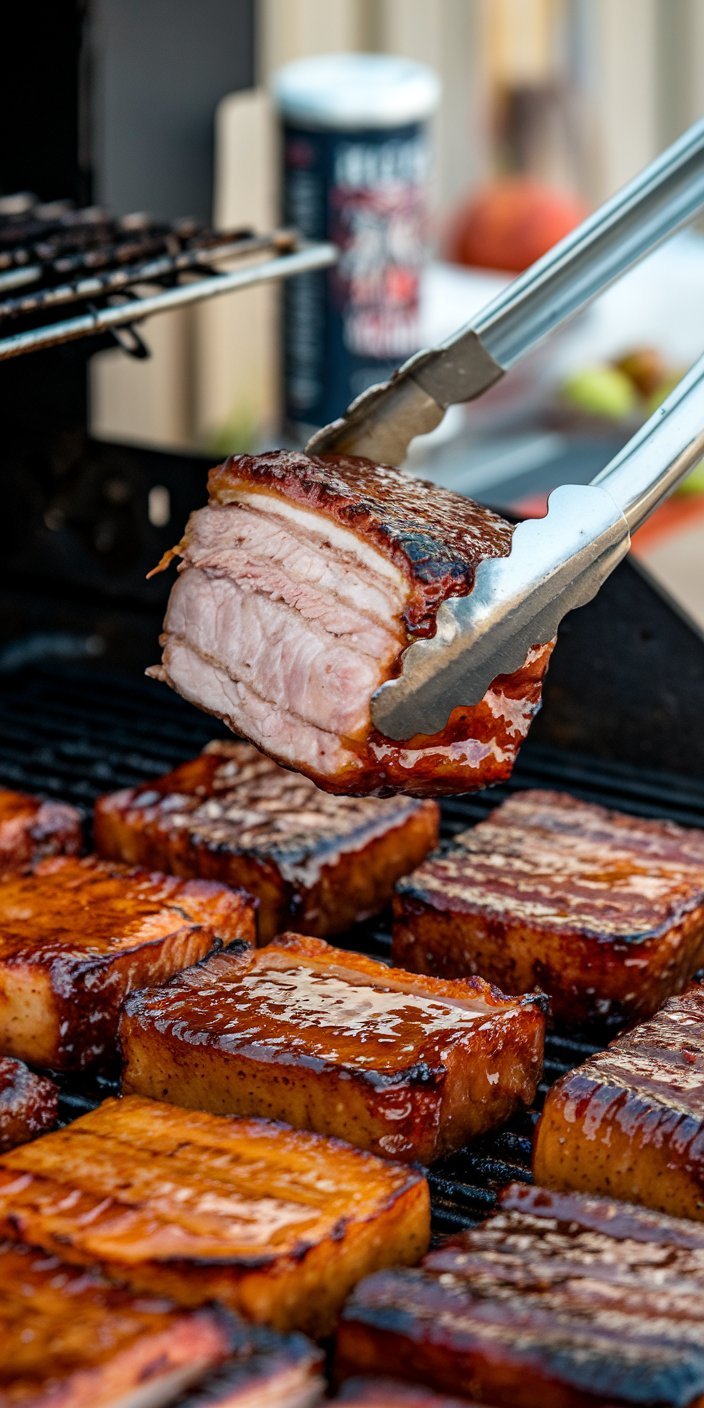
During this stage, the pork will slowly render its fat and start to develop a browned “bark” on the outside. About halfway through (around the 1-hour mark), flip each pork belly cube or gently rotate them with tongs for even cooking – this isn’t strictly required, but can help them cook uniformly if your heat is uneven. By the end of this phase, the cubes should look mahogany brown with some blackened edges, and they will have shrunk in size.
They won’t be super tender yet – that’s okay. (If you have a meat thermometer, you’ll find they’re around 185–195°F internally at this point, which means much of the fat has rendered but the collagen hasn’t fully broken down.) - Prepare the Maple Sriracha Glaze: While the pork is grilling in phase 1, you can prepare the glaze so it’s ready for the next step. In a saucepan (or a heatproof bowl), combine the glaze ingredients: maple syrup, Sriracha, brown sugar, butter, soy sauce, and apple cider vinegar (plus any optional add-ins like a bit of mustard or ginger if using).
Stir everything together. You can simply mix these at room temperature (the brown sugar will dissolve later as it cooks), or for a deeper flavor, heat the mixture gently on the stovetop until the butter melts and the sugar dissolves, then let it cool.
(Heating helps marry the flavors, but isn’t necessary if you’re short on time.) Set this Maple Sriracha glaze aside. It should taste sweet, tangy, and a little spicy – remember that once it cooks with the pork, it will mellow and caramelize. - Glaze and Braise on the Grill (Phase 2): After about 2 hours, the pork belly pieces should be nicely browned. Now it’s time to get them saucy! Using heat-proof gloves or tongs, remove all the pork belly burnt ends from the grill and place them into a disposable aluminum foil pan (a metal baking dish you don’t mind putting on the grill is fine too).
Pour the prepared maple Sriracha glaze over the pork belly cubes. Add the butter cubes as well, scattering them on top. With a long spoon or tongs, toss the pork cubes in the pan so they are all evenly coated in the sauce. The pan will quickly become a pool of delicious sweet and spicy goodness surrounding the meat.
Cover the pan tightly with aluminum foil. (This step effectively braises the pork belly in the flavorful glaze, making each piece ultra-tender.) Place the covered pan back onto the grill, still on the indirect heat side. Close the lid and continue cooking for another 1 to 1½ hours. The liquid in the pan will simmer and infuse the pork with flavor while keeping it moist. About halfway through this phase, carefully stir or flip the pieces in the sauce to ensure all sides get exposure to that glaze. - Check for Tenderness: After about an hour (up to 1½ hours) in the covered pan, check the pork belly burnt ends for tenderness. Open the foil (be careful of the hot steam). The sauce should be bubbly and thicker, and the pork cubes should be very tender when pierced.
You can test by inserting a toothpick or fork into a chunk – it should slide in with almost no resistance, almost like testing a baked potato. If you have a meat thermometer, the internal temperature will likely be around 200–205°F, which is perfect for pull-apart tender pork.
If they’re not quite there yet, re-cover and cook for an additional 15–20 minutes and check again. - Caramelize the Glaze (Final Step): Once the pork belly cubes are melt-in-your-mouth tender, it’s time to finish them off by thickening and caramelizing the glaze. Increase your grill’s heat to medium-high (if gas, turn up the burners on the indirect side to around 350°F; if charcoal, you might need to open vents or add a bit more hot charcoal).
Remove the foil cover from the pan so the pork is now uncovered. Let the pan sit on the grill for another 10–15 minutes with the lid closed. During this time, the glaze will reduce and cling to the meat, and the edges of the pork belly might char slightly – this creates those signature “burnt ends” crispy bits.
Keep an eye to ensure they don’t burn too much (a bit of blackened sugar is fine and tasty, but you don’t want them turning to charcoal). You can give them a stir once for even caramelization. When the sauce looks thick and sticky on the pieces, they’re done. - Serve the Burnt Ends: Using tongs, carefully remove each pork belly burnt end from the pan and transfer to a serving dish or tray. They will be super tender, so handle gently to keep the cubes intact (although if some fall apart, no worries – those make great chef’s treats!).
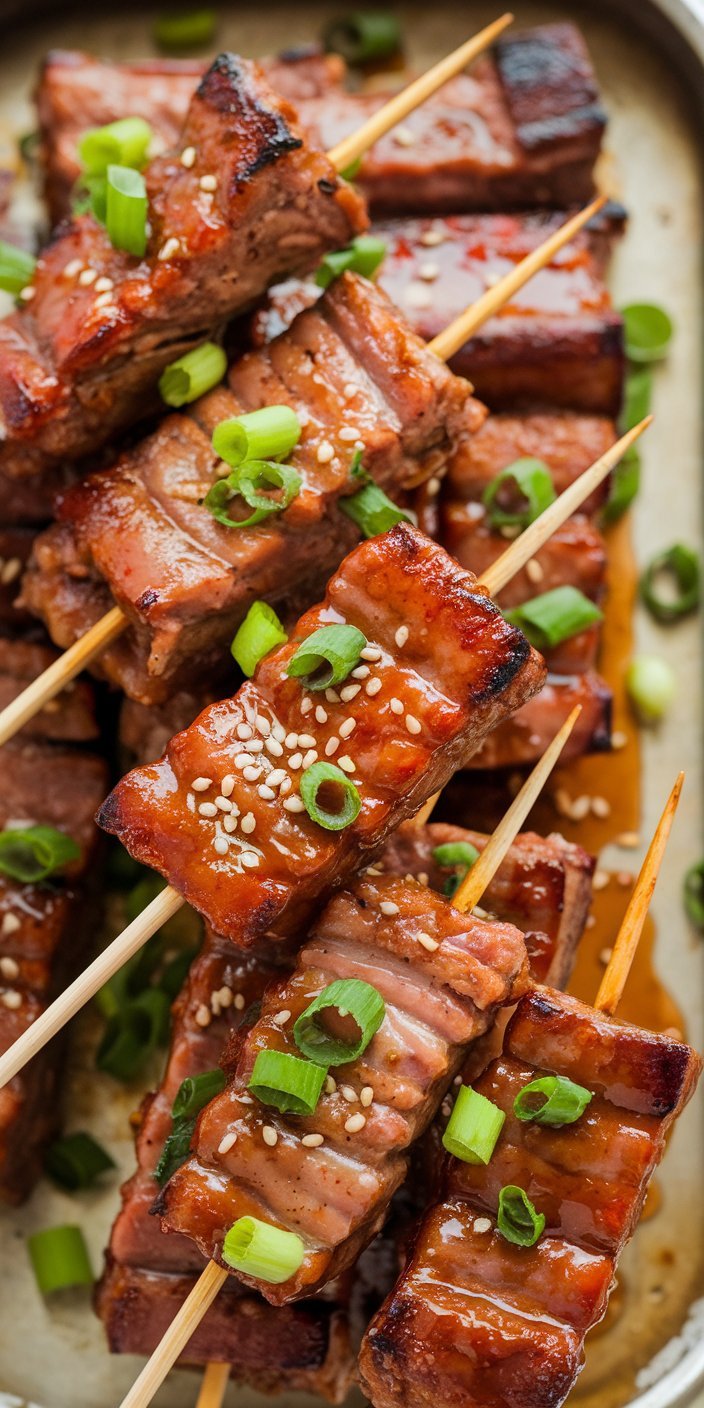
Let them cool for about 5 minutes before serving – this brief rest lets the glaze set a bit and the pork juices redistribute (plus they’ll be very hot!). For presentation, you can garnish with a sprinkle of sesame seeds or sliced green onions for a pop of color, or even a little extra drizzle of warm maple syrup if you want them extra glossy.
Now bite in and enjoy the fruit of your patience – each piece is sticky, sweet, spicy, and smoky all at once. Serve with toothpicks for appetizers or alongside your favorite sides for a meal. Napkins recommended – these burnt ends are gloriously messy in the best way!
Variations of This Recipe
- Preheat and Set Up the Grill: Preheat your grill to low heat, about 225–250°F. Set up for indirect cooking – this means if you’re using a gas grill, turn on one side burner to low-medium and leave the other side off, or if using charcoal, bank the coals to one side of the grill. Aim for a steady low temperature (the inside of the grill should stay in the 225–250°F range).
This low-and-slow heat will ensure the pork belly renders slowly and stays juicy. If you have wood chips (like hickory or applewood), add a smoker box or a foil pouch of soaked wood chips to the hot side for an extra smoky aroma (optional but awesome!).
Also, place a drip pan or a sheet of foil under the cool side grate – the pork belly will drip fat, and a drip pan prevents flare-ups and makes cleanup easier. - Prepare the Pork Belly: While the grill is heating, get the pork belly ready. Pat the pork belly dry with paper towels. Trim off any tough skin or excess top fat if not already removed (you want a good bit of fat marbling, but not a thick rubbery skin cap). Using a sharp knife, cut the pork belly into 1½-inch cubes. Aim for uniform pieces so they cook evenly.
In a large bowl, drizzle the pork belly cubes with a little olive oil (about 1–2 tablespoons) – this helps the seasoning stick. In a separate bowl, mix together all the dry rub ingredients: brown sugar, paprika, chili/cayenne, cumin, garlic powder, onion powder, salt, and pepper. Break up any sugar lumps so it’s well combined.
Now sprinkle this rub all over the pork belly cubes, tossing to coat each piece thoroughly. Every side of each cube should get a good coating of the spiced sugar rub. Let the seasoned pork belly sit for 5–10 minutes to absorb the flavors (you can even prep this up to overnight in the fridge for deeper flavor, but 10 minutes at room temp is fine). - Slow-Grill the Pork Belly (Phase 1): Place the pork belly cubes on the cool side of the grill, over indirect heat. They should NOT be directly over the flame or coals. Arrange them with a little space in between each piece so smoke and heat can circulate. Close the grill lid. Cook the pork belly cubes indirectly for about 1½ to 2 hours, maintaining that 225–250°F temperature inside the grill.
During this stage, the pork will slowly render its fat and start to develop a browned “bark” on the outside. About halfway through (around the 1-hour mark), flip each pork belly cube or gently rotate them with tongs for even cooking – this isn’t strictly required, but can help them cook uniformly if your heat is uneven. By the end of this phase, the cubes should look mahogany brown with some blackened edges, and they will have shrunk in size.
They won’t be super tender yet – that’s okay. (If you have a meat thermometer, you’ll find they’re around 185–195°F internally at this point, which means much of the fat has rendered but the collagen hasn’t fully broken down.) - Prepare the Maple Sriracha Glaze: While the pork is grilling in phase 1, you can prepare the glaze so it’s ready for the next step. In a saucepan (or a heatproof bowl), combine the glaze ingredients: maple syrup, Sriracha, brown sugar, butter, soy sauce, and apple cider vinegar (plus any optional add-ins like a bit of mustard or ginger if using).
Stir everything together. You can simply mix these at room temperature (the brown sugar will dissolve later as it cooks), or for a deeper flavor, heat the mixture gently on the stovetop until the butter melts and the sugar dissolves, then let it cool.
(Heating helps marry the flavors, but isn’t necessary if you’re short on time.) Set this Maple Sriracha glaze aside. It should taste sweet, tangy, and a little spicy – remember that once it cooks with the pork, it will mellow and caramelize. - Glaze and Braise on the Grill (Phase 2): After about 2 hours, the pork belly pieces should be nicely browned. Now it’s time to get them saucy! Using heat-proof gloves or tongs, remove all the pork belly burnt ends from the grill and place them into a disposable aluminum foil pan (a metal baking dish you don’t mind putting on the grill is fine too).
Pour the prepared maple Sriracha glaze over the pork belly cubes. Add the butter cubes as well, scattering them on top. With a long spoon or tongs, toss the pork cubes in the pan so they are all evenly coated in the sauce. The pan will quickly become a pool of delicious sweet and spicy goodness surrounding the meat.
Cover the pan tightly with aluminum foil. (This step effectively braises the pork belly in the flavorful glaze, making each piece ultra-tender.) Place the covered pan back onto the grill, still on the indirect heat side. Close the lid and continue cooking for another 1 to 1½ hours. The liquid in the pan will simmer and infuse the pork with flavor while keeping it moist. About halfway through this phase, carefully stir or flip the pieces in the sauce to ensure all sides get exposure to that glaze. - Check for Tenderness: After about an hour (up to 1½ hours) in the covered pan, check the pork belly burnt ends for tenderness. Open the foil (be careful of the hot steam). The sauce should be bubbly and thicker, and the pork cubes should be very tender when pierced.
You can test by inserting a toothpick or fork into a chunk – it should slide in with almost no resistance, almost like testing a baked potato. If you have a meat thermometer, the internal temperature will likely be around 200–205°F, which is perfect for pull-apart tender pork.
If they’re not quite there yet, re-cover and cook for an additional 15–20 minutes and check again. - Caramelize the Glaze (Final Step): Once the pork belly cubes are melt-in-your-mouth tender, it’s time to finish them off by thickening and caramelizing the glaze. Increase your grill’s heat to medium-high (if gas, turn up the burners on the indirect side to around 350°F; if charcoal, you might need to open vents or add a bit more hot charcoal).
Remove the foil cover from the pan so the pork is now uncovered. Let the pan sit on the grill for another 10–15 minutes with the lid closed. During this time, the glaze will reduce and cling to the meat, and the edges of the pork belly might char slightly – this creates those signature “burnt ends” crispy bits.
Keep an eye to ensure they don’t burn too much (a bit of blackened sugar is fine and tasty, but you don’t want them turning to charcoal). You can give them a stir once for even caramelization. When the sauce looks thick and sticky on the pieces, they’re done. - Serve the Burnt Ends: Using tongs, carefully remove each pork belly burnt end from the pan and transfer to a serving dish or tray. They will be super tender, so handle gently to keep the cubes intact (although if some fall apart, no worries – those make great chef’s treats!).
Let them cool for about 5 minutes before serving – this brief rest lets the glaze set a bit and the pork juices redistribute (plus they’ll be very hot!). For presentation, you can garnish with a sprinkle of sesame seeds or sliced green onions for a pop of color, or even a little extra drizzle of warm maple syrup if you want them extra glossy.
Expert Tips for Perfect Pork Belly Burnt Ends
- Choose Quality Pork Belly: Start with a good piece of pork belly that’s evenly layered with meat and fat. Remove the tough outer skin (rind) if present, but leave most of the fat – that fat is what will render and baste the meat, making each bite tender and moist.
- Use Real Maple Syrup: Always opt for pure maple syrup for the glaze, not the artificial pancake syrup. Real maple syrup has a richer flavor and caramelizes better, giving the authentic sweet-smoky taste this recipe needs.
- Low and Slow is Key: Maintain a low, steady temperature on the grill for the first phase of cooking. Rushing the process with high heat can cause the outside to burn before the inside is tender. Cooking around 225–250°F and taking your time will yield succulent results (remember, it’s hard to rush perfection in BBQ!).
- Prevent Flare-Ups: Pork belly will drip a lot of fat as it cooks. To avoid flare-ups (which can cause sooty smoke or burnt flavors), always cook with indirect heat and use a drip pan under the meat to catch fat. If you notice any flare-ups, move the meat further from the heat or reduce the burner. Keeping the grill closed also limits oxygen that can feed flames.
- Add Smoke (Optional): If you love a smoky flavor, add some wood to your grill. Use a foil packet of soaked wood chips or a smoker box on a gas grill, or a couple of wood chunks on a charcoal fire. Hickory, applewood, or cherry wood go great with pork. This can give your burnt ends an extra dimension of smokiness almost like they were done in a smoker.
- Rest Before Serving: After cooking, let the burnt ends rest for a few minutes before you serve them. Resting (even just 5 minutes) helps the meat fibers relax and the juices redistribute, so you don’t lose all that juiciness with the first bite. Plus, the glaze thickens a touch as it cools slightly, which makes each piece less messy to pick up.
- Cleaning Tip: The glaze is super sticky (that’s why it’s so good!). For easier cleanup, soak your grill grates and any pans in hot soapy water soon after cooking. If you used a disposable foil pan, you can simply discard it – easy peasy.
FAQs
Q1: What exactly are pork belly burnt ends? Why are they called “burnt” if they taste so good?
A: Burnt ends originated as a happy accident in Kansas City BBQ joints. Pitmasters would smoke whole beef briskets, and the fatty, outer edges would become deeply caramelized (almost “burnt”) during the long cooking. These bits were so flavorful that they started serving them separately – and people loved them!
Traditionally, burnt ends are those crispy, smoky brisket point pieces. Pork belly burnt ends are a twist on that concept: we take pork belly (which is the same cut as bacon, but uncured and un-sliced) and cook it in a similar low-and-slow way until the cubes get charred ends and sticky caramelized surfaces.
Despite the name, they’re not actually burnt to a crisp – they’re just well-caramelized. The inside stays tender and juicy, while the outside has a delicious bark (charred, chewy edges). Think of them as bite-sized pieces of intensely flavorful BBQ heaven, often nicknamed “meat candy” for their rich, sweet, smoky taste.
Q2: I don’t have a grill – can I make these in the oven (or in a smoker)?
A: Yes! While this recipe is written for a grill, you can absolutely adapt it. For an oven method, you won’t get the smoke, but you can still achieve tender, sticky burnt ends. Prepare and season the pork belly cubes as directed.
Preheat your oven to 325°F. Put the seasoned pork belly in a deep roasting pan and pour a bit of liquid (for example, a mix of apple cider vinegar and water or a bit of stock – about 1 cup) around the cubes to mimic the moist environment. Cover the pan with foil and roast for about 2 hours at 325°F. Then remove the foil, drain any excess liquid, and toss the pork pieces in the maple-sriracha glaze.
Increase oven temp to 400°F and roast uncovered for another 15–20 minutes until the glaze is bubbling and caramelized. They should be tender (test with a toothpick) and nicely glazed. For a smoker method (if you have a smoker or a pellet grill), you can follow the same general two-phase approach: smoke the seasoned cubes at ~250°F for 2–3 hours, then pan them with the glaze, cover and cook until tender, and finish uncovered to set the sauce.
The smoker will add even more authentic BBQ smoke flavor. Either way, keep an eye on them towards the end so the sugars don’t overly burn. The result in oven or smoker will be very similar – you’ll get amazingly tender, sweet-and-spicy pork bites.
Q3: How spicy are these burnt ends? Can I make them milder (or hotter)?
A: The spiciness here is very customizable. Sriracha sauce gives a medium heat level – on its own it’s a hot chili-garlic sauce, but when mixed with the sweet maple syrup and brown sugar, the heat is tempered. Most people will find the default recipe has a gentle kick, a nice warming heat that builds but isn’t overwhelming.
If you prefer them mild, simply use less Sriracha (for example, use 2 tablespoons instead of ¼ cup) or replace it with a milder sauce like a sweet chili sauce or even ketchup with a pinch of cayenne for just a hint of heat. You can also add more brown sugar or honey to the glaze to further balance and soften the spice. On the flip side, if you love extra heat, you can ramp it up!
Try adding more Sriracha (or a hotter chili paste), or even toss in diced fresh jalapeño or a dash of habanero powder to the glaze. Another trick for heat lovers is to sprinkle a bit of cayenne pepper into the dry rub. The beauty of this recipe is you can adjust the sweet-to-spicy ratio easily.
Start with the recommended amounts, then taste your glaze before you coat the pork – if it’s too tame, stir in more Sriracha until it makes your taste buds happy. Remember, you can also serve additional Sriracha or hot sauce on the side, so those who want more spice can splash it on their portion. This way everyone wins!
Q4: What’s the best way to store and reheat any leftovers?
A: If you somehow have leftovers (these tend to get devoured!), store them in an airtight container in the refrigerator for up to about 3 or 4 days. The glaze will solidify when cold, but that’s normal. For reheating, the best method is to use an oven or toaster oven so the pieces re-crisp a bit. Preheat your oven to around 350°F.
Spread the burnt ends out on a foil-lined baking sheet (spraying or brushing the foil with a little oil can help prevent sticking). Heat them for about 10 minutes, or until they’re warmed through and the glaze is bubbly again. You can also pop them on a hot grill for a few minutes, turning once, to reheat – just be attentive so they don’t burn.
An air fryer set at 350°F for 5–8 minutes is another fantastic way to reheat these; it will revive some of that exterior char and keep them sticky. While you can microwave burnt ends in a pinch (about 1–2 minutes, covered, on medium power), be aware that the texture will suffer a bit – they can turn rather soft and chewy.
If microwaving, a tip is to microwave in short bursts and maybe finish under the broiler for a minute to caramelize the sugars again. However you reheat, add a fresh drizzle of BBQ sauce or a touch more Sriracha-maple mixture after warming to refresh the glaze if needed.
And one more thing: never reheat in the foil pan in a microwave (foil can’t go in microwaves). Transfer to a microwave-safe dish if using that method. Enjoy round two of your burnt ends!
Q5: Can I use a different cut of meat instead of pork belly?
A: Pork belly is the star here because of its fat content and texture, but you do have some options. If you want to try beef burnt ends, the classic choice is a brisket point cut (the fatty end of a beef brisket). You could smoke or grill brisket cubes following a similar process – in fact, many BBQ enthusiasts make brisket burnt ends by cubing smoked brisket and simmering them in sauce until caramelized.
Another option mentioned in some recipes is using a chuck roast (sometimes called “poor man’s burnt ends”). Chuck roast is cheaper than brisket but can be cut into cubes and cooked low and slow in a similar way. The texture will be a bit different (beef muscle fiber vs. pork belly), and beef will likely need a longer cook to get tender (expect a few extra hours and it really benefits from smoking).
If you’re looking for a pork alternative, pork shoulder (pork butt) cut into cubes could work as well – it has decent fat content and can get tender with slow cooking, though it won’t be as buttery-rich as belly. We’ve even seen creative folks make “burnt ends” from chicken thighs or SPAM (for fun), but those will obviously have different cooking times and flavors.
For simplicity, if you substitute the meat, stick to the general principle: use well-marbled, fatty pieces, cook them slowly until tender, and then glaze and caramelize. Keep in mind that different meats may absorb the maple-sriracha glaze differently – for example, beef has a stronger flavor on its own, so the sweet glaze will be more of a contrast. Always adjust seasoning as needed.
But by all means, feel free to experiment – the maple-sriracha magic can work on more than just pork belly. Just be prepared to adjust cook times (and possibly the amount of glaze) for the size and type of protein you use. Happy grilling and experimenting!
Maple Sriracha Pork Belly Burnt Ends
Ingredients
Method
- Pat the pork belly dry with paper towels. Trim off any tough skin if it’s still attached. Cut the pork belly into 1½-inch cubes for even cooking. Drizzle with a little olive oil and toss to coat the cubes. In a separate bowl, mix together the dry rub ingredients: brown sugar, smoked paprika, chili powder, cumin, garlic powder, onion powder, salt, and pepper. Coat each pork belly cube generously with the dry rub and let it sit for 5-10 minutes.
- Preheat your grill to 225–250°F for indirect grilling. Set it up for low and slow cooking (medium-high heat on one side, no heat on the other). Use a drip pan or foil under the grill grates to catch any drippings. Add wood chips if you want a smoky flavor (optional).
- Place the pork belly cubes on the cool side of the grill, making sure they’re not directly over the flame. Close the lid and grill for 2–2½ hours. Flip the pork belly pieces halfway through to ensure even cooking. The pork belly should start to render its fat and develop a nice brown exterior.
- While the pork belly is grilling, combine maple syrup, Sriracha, brown sugar, butter, soy sauce, and apple cider vinegar in a saucepan over medium heat. Stir occasionally and let the mixture simmer until the sugar has dissolved and the glaze thickens slightly (about 5-7 minutes). Remove from heat and set aside.
- After the pork belly has cooked for 2–2½ hours, place the cubes in a foil pan and pour the Maple Sriracha glaze over the pork belly. Toss to coat the cubes evenly. Cover the pan with foil and place it back on the grill. Grill for another 1–1½ hours, until the pork is tender and the glaze has thickened. Stir the pork belly cubes once or twice during this phase to ensure they’re evenly coated with the glaze.
- After 1–1½ hours, remove the foil and increase the grill heat to medium-high (around 350°F). Let the pork belly cubes cook uncovered for an additional 10–15 minutes to caramelize the glaze and create that signature crispy, charred exterior.
- Remove the pork belly from the grill and let it rest for 5-10 minutes. Garnish with sesame seeds or chopped green onions if desired. Serve with lime wedges and enjoy these sticky, spicy maple sriracha pork belly burnt ends with your favorite sides or as a flavorful snack!