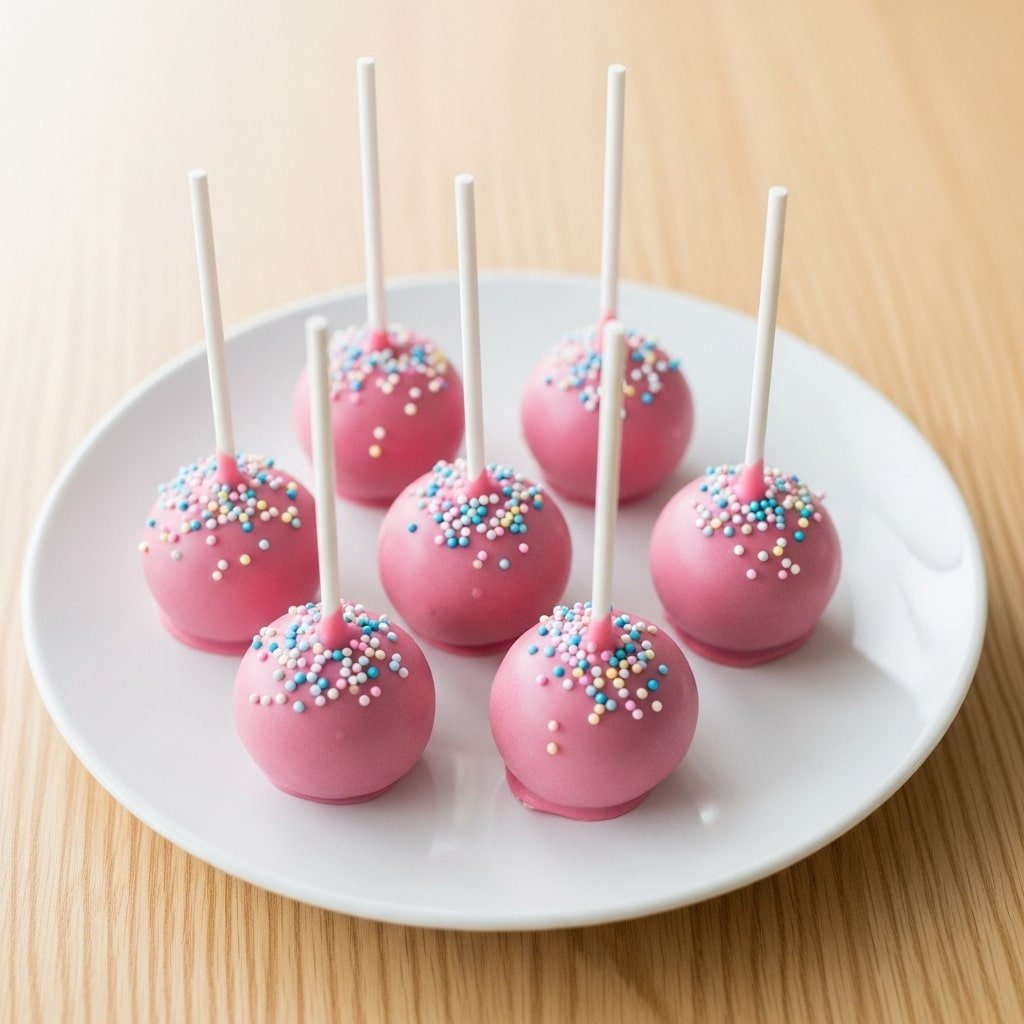
Cute & Easy Homemade Pink Cake Pops
Pink cake pops are the kind of dessert that instantly makes people smile. They’re cute, bite-sized, and coated in a smooth pink candy shell that cracks perfectly with every bite. Inside, you get a soft, moist cake center that tastes rich and bakery-style, yet they’re surprisingly easy to make at home.
Whether you’re planning a birthday party, baby shower, Valentine’s Day dessert table, or just want a fun weekend baking project, pink cake pops fit the moment beautifully.
This recipe is designed to be foolproof, even if you’ve never made cake pops before. You don’t need fancy tools or professional baking skills. With simple ingredients, clear steps, and plenty of tips, you’ll learn how to make cake pops that hold their shape, dip smoothly, and look polished enough for parties or gifting.
If you’ve ever wondered how bakeries get those perfectly round pink cake pops, this guide will walk you through everything from mixing to dipping and storing, so you can get consistent, delicious results every time.
Why You’ll Love This Recipe
- Easy and beginner-friendly, with no advanced baking techniques
- Soft, moist cake texture balanced by a smooth candy coating
- Perfect for parties, holidays, and special occasions
- Make-ahead friendly for stress-free prep
- Customizable colors, flavors, and decorations
- Great for gifting, bake sales, and dessert tables

Pink Cake Pops
Ingredients
Method
- Bake the vanilla cake according to package or recipe instructions. Cool completely.
- Crumble the cooled cake into fine crumbs in a large bowl.
- Add vanilla frosting gradually and mix until the texture holds together when rolled.
- Roll mixture into 1-tablespoon-sized balls and place on a lined tray.
- Chill for 1–2 hours until firm.
- Melt a small amount of pink candy melts. Dip the tip of each lollipop stick into the candy and insert halfway into each cake ball.
- Chill again for 10–15 minutes.
- Melt remaining candy melts until smooth, thinning if needed.
- Dip each cake pop, tap off excess coating, and decorate immediately.
- Stand upright and allow to set completely at room temperature.
Notes
- Do not overmix frosting, or cake pops may become greasy.
- Let candy melts cool slightly before dipping to prevent cracking.
- Cake pops are make-ahead friendly and ideal for parties, bake sales, and holidays.
Ingredients
- Vanilla cake mix (or homemade vanilla cake)
- Eggs
- Vegetable oil
- Water or milk
- Vanilla frosting
- Pink candy melts
- Lollipop sticks
- White chocolate or almond bark (optional, for stability)
- Sprinkles or decorations (optional)
Ingredients Guide (Ingredient Breakdown)
Vanilla Cake Mix
Vanilla cake is the classic base for pink cake pops because it has a neutral flavor and light color. This allows the frosting and coating to shine. You can use boxed cake mix for convenience or bake a homemade vanilla sponge if you prefer a from-scratch approach.
Eggs
Eggs help bind the cake and provide structure. They also contribute to moisture. If you’re using a boxed mix, follow the package directions. For egg-free versions, use a commercial egg replacer or flax eggs.
Vegetable Oil
Oil keeps the cake soft and moist, which is important since cake pops rely on a tender crumb. You can substitute melted butter for richer flavor, but oil produces a softer texture.
Water or Milk
Liquid activates the cake mix and determines crumb softness. Milk adds richness, while water keeps things simple. Either works well for cake pops.
Vanilla Frosting
Frosting binds the cake crumbs together. Vanilla frosting is ideal because it doesn’t overpower the cake. Cream cheese frosting can be used, but it creates a softer mixture, so you’ll need less.
Pink Candy Melts
Candy melts create the smooth outer shell. They’re designed to melt easily and set firm at room temperature. Choose high-quality candy melts for better flavor and shine.
Lollipop Sticks
These give cake pops their classic look and make them easy to serve. Paper sticks are best because they grip the cake better than plastic.
White Chocolate or Almond Bark (Optional)
If your candy melts are thick, adding a small amount of white chocolate or almond bark can improve consistency and help achieve a smooth coating.
Sprinkles or Decorations
Decorations add personality. Think heart sprinkles for Valentine’s Day, pastel pearls for baby showers, or simple white drizzle for an elegant finish.
Step-by-Step Instructions
1. Bake the vanilla cake according to the package or recipe instructions.
Let it cool completely before moving to the next step.
2. Crumble the cooled cake into a large bowl.
Use clean hands or a fork to break it into fine crumbs.
3. Add vanilla frosting gradually to the crumbs.
Mix until the texture resembles dough that holds its shape when rolled.
4. Scoop and roll the mixture into balls.
Each ball should be about one tablespoon in size.
5. Place the cake balls on a lined baking sheet.
Chill in the refrigerator for 1–2 hours until firm.
6. Melt a small amount of pink candy melts.
Dip the tip of each lollipop stick into the melted candy.
7. Insert the stick halfway into each cake ball.
This step helps secure the stick in place.
8. Chill again for 10–15 minutes.
This prevents cake pops from sliding off during dipping.
9. Melt the remaining pink candy melts until smooth.
Stir gently to avoid air bubbles.
10. Dip each cake pop into the melted coating.
Tap off excess candy for a smooth finish.
11. Add sprinkles immediately before the coating sets.
12. Place cake pops upright to dry.
Use a stand or poke holes in a cardboard box.
Variations & Customizations
Chocolate Pink Cake Pops
Use chocolate cake and chocolate frosting for a richer base that pairs beautifully with pink coating.
Strawberry Cake Pops
Swap vanilla cake for strawberry-flavored cake for extra pink color and fruity flavor.
Vegan Cake Pops
Use a vegan cake mix, dairy-free frosting, and vegan candy melts.
Gluten-Free Cake Pops
Choose a gluten-free cake mix and verify that your candy melts are gluten-free.
Keto-Inspired Option
Use almond flour cake, sugar-free frosting, and keto-friendly chocolate for a low-carb twist.
Flavor Boosts
Add almond extract, lemon zest, or freeze-dried strawberry powder to the cake mixture for a unique taste.
Serving Guide
Birthday Parties
Serve pink cake pops on a decorative stand as part of a dessert table. Pair with cupcakes or cookies for variety.
Baby Showers
Pink cake pops are perfect for baby showers. Wrap them individually as party favors.
Valentine’s Day
Decorate with heart sprinkles and pair with chocolate-covered strawberries.
Bridal Showers
Keep decorations minimal with white drizzle for an elegant look.
Bake Sales
Individually wrapped cake pops are easy to sell and transport.
Holiday Gatherings
Customize sprinkles and shades of pink to match seasonal themes.
Storage & Reheating Guide
Room Temperature
Store cake pops in an airtight container for up to 2 days. Keep them away from heat and sunlight.
Refrigerator
Refrigerate for up to 1 week. Allow them to come to room temperature before serving.
Freezer
Freeze undecorated cake pops for up to 2 months. Thaw overnight in the refrigerator before dipping.
Reheating
Cake pops don’t need reheating. If chilled, let them sit at room temperature for best texture.
Shelf Life Tips
Always store cake pops in a dry environment to prevent condensation.
Common Mistakes to Avoid
Using Too Much Frosting
Too much frosting makes cake pops greasy and unstable. Add frosting gradually.
Not Chilling Enough
Warm cake balls can fall apart during dipping. Chill thoroughly.
Overheating Candy Melts
Overheated melts become thick and grainy. Melt slowly and stir often.
Skipping the Stick-Dipping Step
Dipping the stick in candy helps anchor it securely.
Dipping Cold Cake Pops in Hot Candy
Extreme temperature differences can cause cracking. Let candy cool slightly.
Expert Tips for Best Results
- Use a cookie scoop for evenly sized cake pops.
- Thin candy melts with a small amount of coconut oil if needed.
- Tap gently after dipping to remove excess coating.
- Decorate immediately before the coating sets.
- Work in small batches to keep cake pops cold and stable.
FAQs
Can I make pink cake pops ahead of time?
Yes, they’re perfect for making ahead. Store finished pops in the fridge until serving.
Why are my cake pops cracking?
Cracks usually come from temperature differences. Let candy melts cool slightly before dipping.
Can I use homemade frosting?
Yes, but use less than store-bought frosting since it’s usually softer.
How do I keep cake pops from falling off the stick?
Chill them well and always dip the stick in melted candy first.
Can I color my own candy melts?
Yes, use oil-based food coloring only.
Are cake pops meal prep friendly?
Yes, they store well and are easy to portion for events.
Can I skip the lollipop sticks?
Absolutely. Serve them as cake truffles instead.
How far in advance can I freeze them?
Up to two months if stored properly.
Final Thoughts / Conclusion
Pink cake pops are fun, festive, and surprisingly simple to make at home. With the right balance of cake and frosting, plus a smooth pink coating, you can create bakery-style treats for any occasion.
This recipe is designed to give you confidence, whether you’re baking for a party, holiday, or just because. Try them once, and you’ll see how easy it is to customize flavors and decorations to match your event. If you give these pink cake pops a try, save the recipe for later and share your results with friends and family.